Hosting a Tasting Menu At Home

There is no better home-cook flex than to host a well-executed tasting menu for friends.
Unfortunately, most that try fail, and they fail hard. If you haven’t attended one, just imagine a procession of luke-warm courses that are served, in awkwardly long intervals, by a stressed out and exhausted host. Conversation from guests centers around the scuffle in the kitchen, and the night ends with encouraging-yet-condescending words of “I’m so glad you tried this.” It’s decidedly not a restaurant experience.
I’ve hosted many such failures, but over time — and thanks to my days learning at a restaurant — I’ve figured out what works and what doesn’t. A well-executed tasting menu creates an experience for the guests that is elevated, not diminished, by the at-home experience. No restaurant can top the hospitality of a lived and loved home. But it takes detailed planning, menu strategy, and restraint to do it right.
In this post, I’ll share what I’ve learned to help you host a tasting menu at home. To illustrate, I’ll walk you through an example when I hosted 6 friends for a ten course meal. When done right, a menu like this scales very well, so I served this menu two nights in a row to two separate groups of 6.


Consideration #1: Safety
Spoiler: If you’re going to pull this off, you can’t cook everything at the same time. Executing a tasting menu dinner at home requires diligent coordination and planning, especially when it comes to how and when you heat or chill your food. It’s a juggling act, but the one ball that you can’t drop is food safety. So before we get to my suggestions, let’s brush up on what you need to know.
No perishable food should be kept in the danger zone of 40f to 135f for more than two hours. Whether you are heating something up before your guests arrive or chilling something down to reheat it later, keep this in mind.
You need to clean. Often. Wash your hands, cutting board, and other equipment often. Beyond food safety, this also helps your guests feel like you are in control. The last thing you want is a guest to glimpse into a horror show kitchen environment that removes them from the controlled and delicate trance at the table.
Cool. Let’s get to the good stuff.
CONSIDERATION #2: Menu design
Unlike a restaurant, your home kitchen has lots of constraints. First of all, you’re just one person. Second, your stove, sink, and counters don’t have enough space. You simply won’t be able to cook every dish (and clean them after!) at the same time.

So, rather than pick a menu and then figure out how to do it, you need to identify your constraints and then find a menu that fits them. To ensure that the meal is paced like a real restaurant, you’ll need to cook multiple dishes (e.g. course 4 and 5) at the same time. The best way to do that is to choose a menu that makes it possible.
1. Consider your heat sources
The primary limiting factor is probably your heat sources. Before deciding on a single dish, you need to ask yourself: How many heat sources do I have? And how many of them can I use at the same time? You’ll need to map out your menu such that, at peak utilization, you never need more heat sources than you have.
2. When it makes sense, go cold!
When your heat sources are at full capacity, or if you’re anticipating them being at full capacity in a course or two, you can serve cold dishes.

Thankfully, cold dishes work very well as starting bites or desserts. Consider veggie-focused amuse bouche to start the meal, raw seafood or cold broths as earlier courses, and ice creams or custards for dessert.
3. Cook sous vide
When it comes to heat sources, a sous vide device (called an immersion circulator) is far and away the most effective tool for pulling off a tasting menu. When writing a tasting menu, I always choose at least one course that I can cook with sous vide while I deal with other courses. I ensure that I have enough room in the water bath to reheat other courses (e.g. purees that I made earlier in the day) in the same water bath.
If you haven’t cooked sous vide before, it’s essentially just heating up water to a precise temperature, putting food in a ziploc bag, and putting the bag in the heated water to cook.
Unlike cooking in an oven, sous vide’s usage of heated water enables you to keep food at the exact temperature you want it to be. For example, when you cook a chicken in the oven at 350f, you create a balancing act between the chicken (which wants to be 165f) and the oven (which is blasting heat that’s far hotter than it needs to be). This means that there is just a tiny window when the chicken comes out perfect. But with sous vide, you can surround the chicken with the exact temperature it should be (i.e. 165f) so you can leave the chicken at the perfect serving temperature as long as you want. In fact, sous vide is so precise that you can even cook the chicken to much lower temperatures and still be safe (even 140) because you’re using time to pasteurize the chicken too. This unlocks whole new flavors for your kitchen.
For home tasting menus, sous vide can be used to:
Cook a course to the perfect temperature and leave it there until its time
Reheat multiple courses to the perfect serving temperature at once
Pre-cook dishes to the perfect temperature so you only need to sear when your guests arrive
If you don’t already cook sous vide, this is the best sous vide device out there. It’s the smallest and most efficient, but it’s also designed like how Apple would design kitchen gear. It comes with an app to control your kitchen from anywhere. You’ll also need a container with a lid and hole and gallon-sized freezer bags.
4. Choose courses with very little a la minute prep
You’ll also want to ensure that at least a couple courses are plate-it-and-send-it worthy. Something that you can either keep in the fridge without its losing quality or keep in the water bath until it’s ready to serve. The a la minute elements of a dish (e.g. a strong sear) are still very important for both flavor and theatrics, but those elements can be the singular focus of a dish. The supporting cast of ingredients in that dish are better off with less prep.
5. Choose courses that require different serving plates

Don't plan to serve two courses in a row that would need the same serving plate. This enables you to prep for the next course while your guests are eating the previous one. It also keeps variety aesthetically. And once you’re feeling really organized, this also lets you store plates for cold dishes in the freezer and for warm dishes in the oven, helping to keep food at the correct temperature while you're plating something intricate.
CONSIDERATION #3: MEAL EXECUTION
With the right menu, everything comes down to execution. Here’s what I recommend for a smooth evening.
1. Prepare as much in advance as possible
Between plating dishes, washing dishes, and communicating with guests, you will not have time for much chopping or mixing! I chopped all garnishes in advance, cooked meats sous vide in advance and simply did the finishing sear for the meal, etc.
For every ingredient, you need to ask yourself: Will the quality of this ingredient suffer if I make it in advance? If the answer is no, or even if it is a maybe and the ingredient isn’t that important, you should make it in advance. And you can be creative about it too. Are there parts of the ingredient you can do ahead? Everything but salting it? You’ll thank yourself later.
2. Enlist the help of a friend
For this meal, I was the only cook. But a friend to help with other stuff (cleaning, keeping waters full, helping people find the bathroom) will help to take the pressure off. Even better if you can find a friend that helps with an alcohol pairing (my friend did cocktails for each course here).

3. Prep your station
Before everyone arrives, you want to set yourself up for maximum efficiency. I organized my fridge so that earlier dishes are available for easy access. Everything was in its own container (or solo cup in this case because I ran out of containers). Just as the meal begins, take out refrigerated items that need to be at room temperature (e.g. pickled items for a warm dish, meat you will soon finish in oven or pan).
4. Tailor the experience
Ultimately, you want to find a way to embrace the fact that this meal is at home. Your friends have been to hundreds of restaurants, but if you pull this off, this will be the first restaurant-quality experience they’ve had at a home. You can blur the lines of home and restaurant by leaning into the best aspects of each. For example:
Print out menus, perhaps with a personal touch on each menu that only a friend would try.
Describe each course like a fine dining restaurant would, but ‘break the fourth wall’ with the occasional slip-up of something super casual. For one tasting menu I served, we made one alcohol pairing a bit of Coors Light.
Embrace theatrics when you can. Wait until you serve a course before pouring the sauce, or even sear or blowtorch something before the guests. Something about seeing a friend do these things makes them feel so much more real and raw than when a real chef does it.

How I did it
When I hosted this dinner, I had one oven, 4 burners, one blowtorch, and 2 immersion circulators. I chose a menu where, by the second-to-last course, all of these were in use at the same time. The circulators were set to the perfect temperature where it heated but not overcooked anything added. Here’s how each course went down:
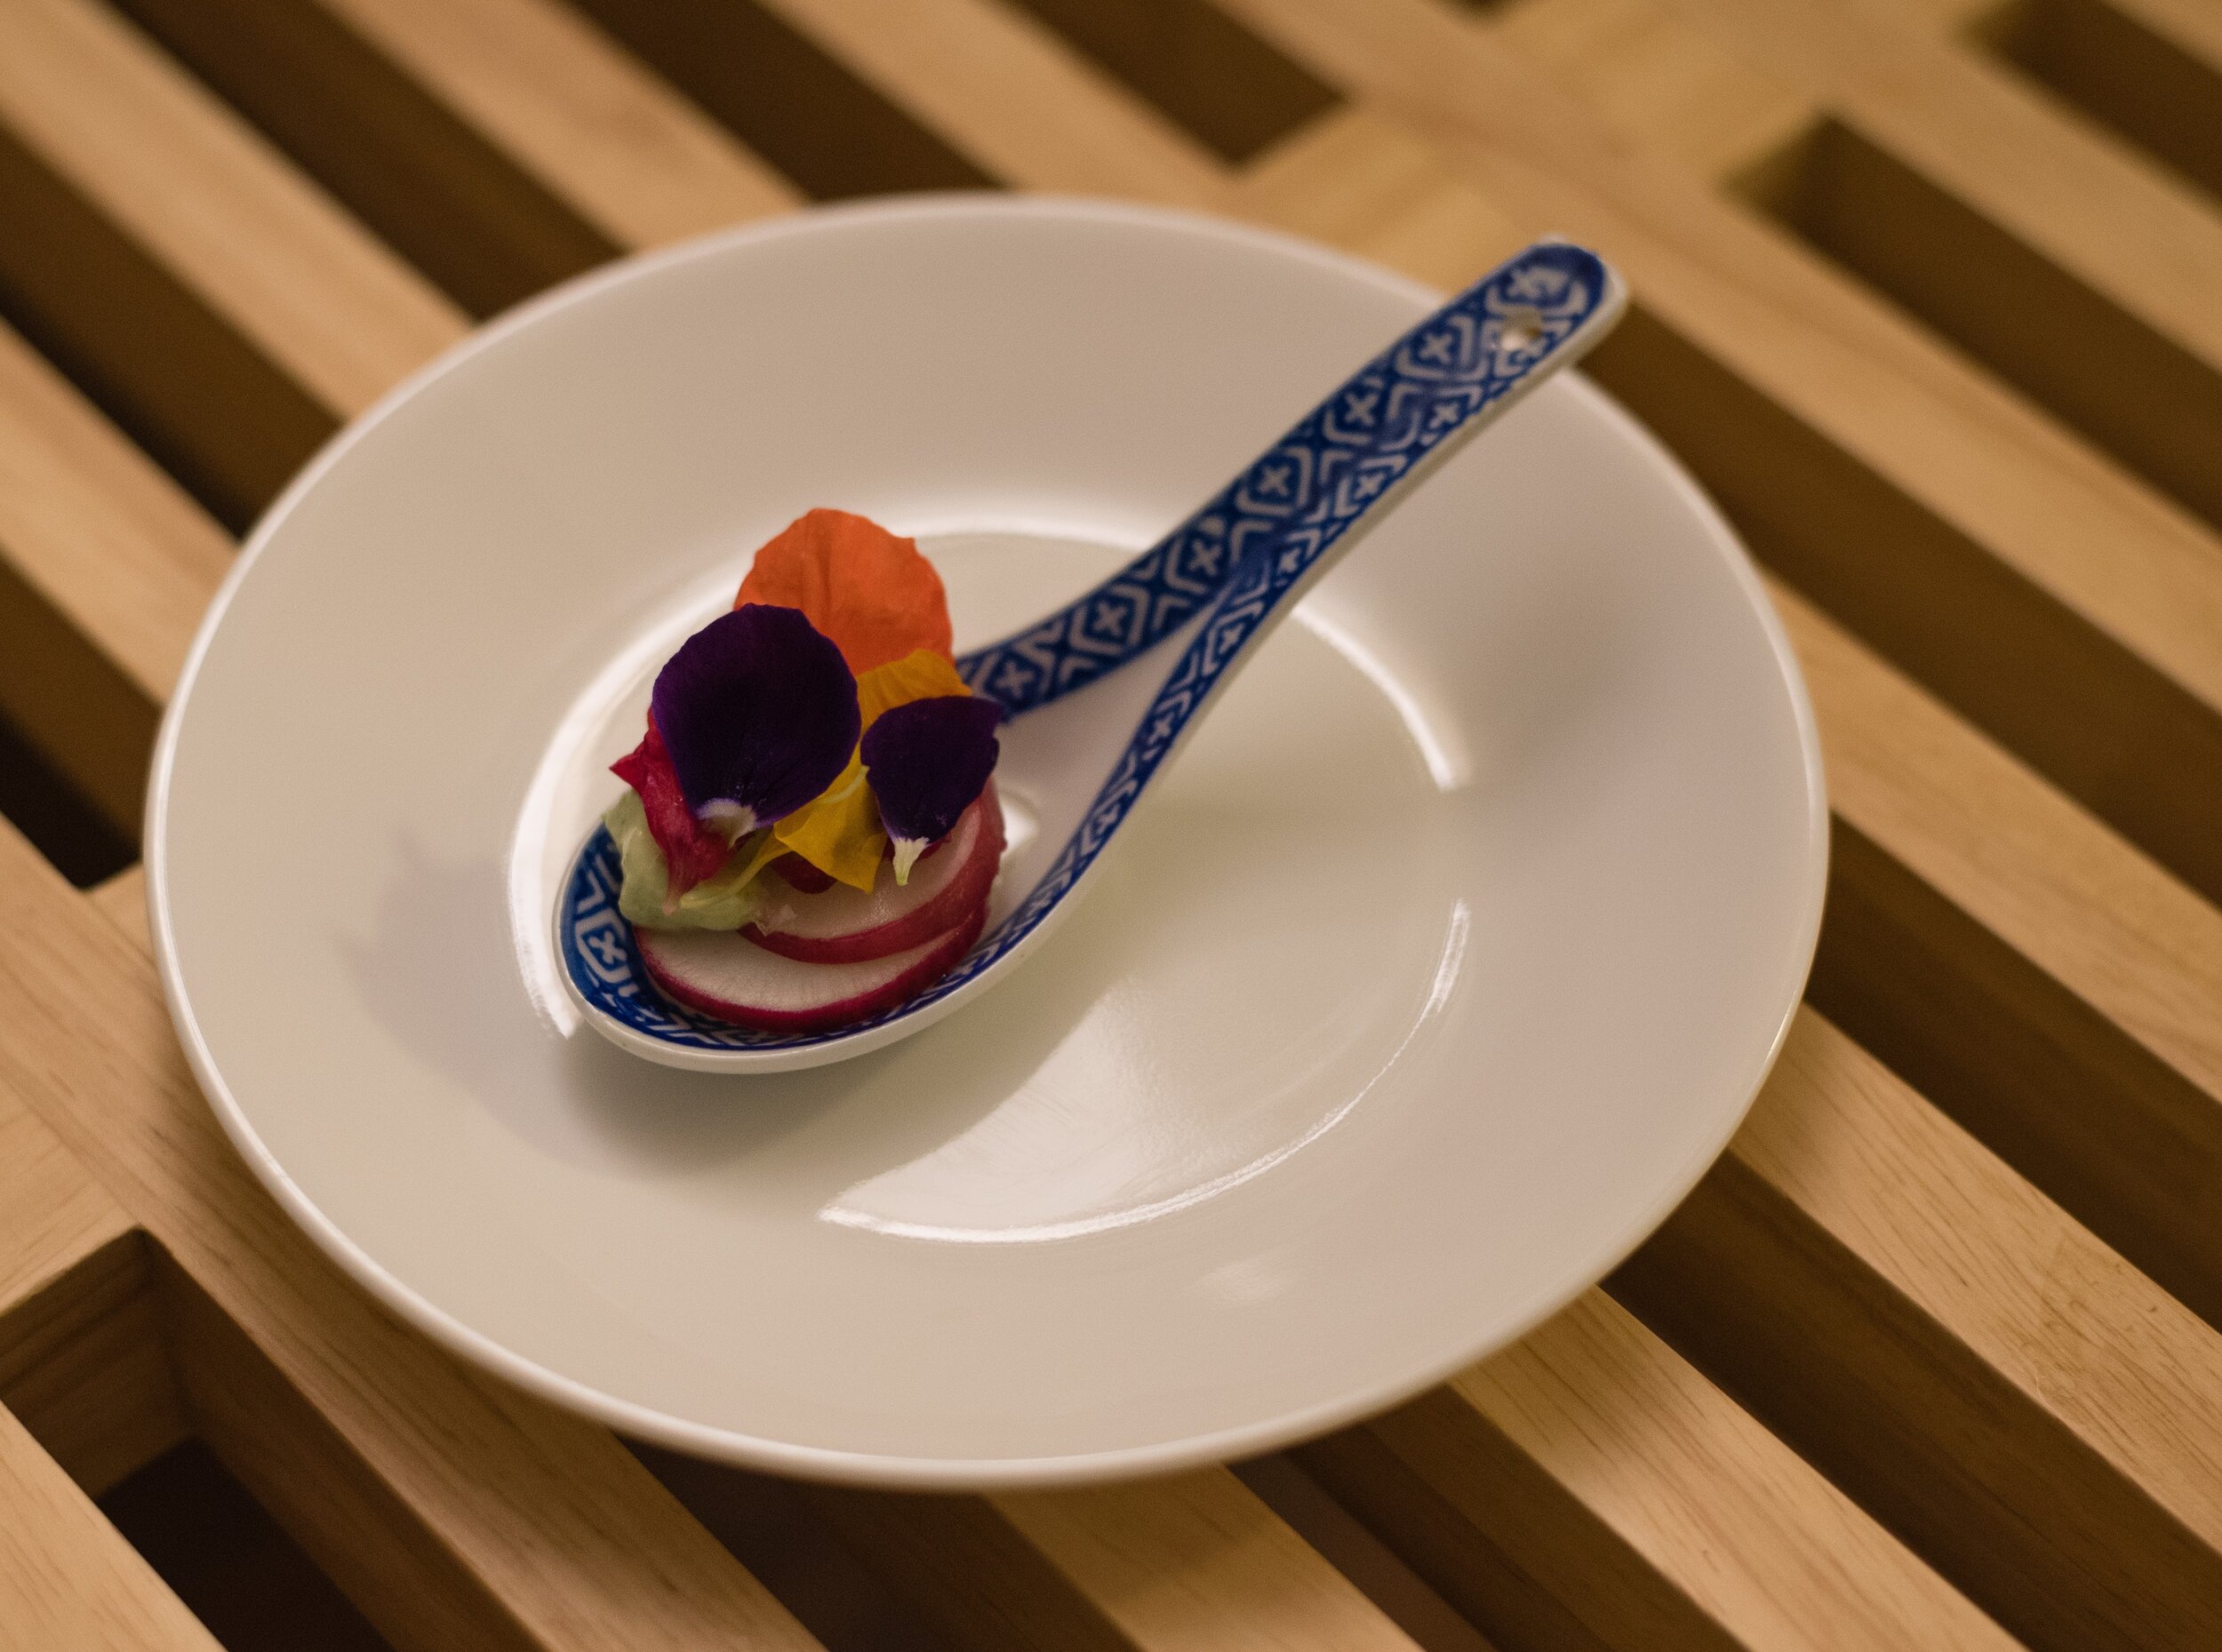
Radish with tarragon and parsley cream and edible flowers: Served cold, all ingredients were prepped in advance and stored in the fridge. When my guests arrived, I assembled the dish and then served. I also turned on the stove for course 6 in order to bring my tonkotsu broth to a simmer and put the celeriac puree for course 7 in the immersion circulator.
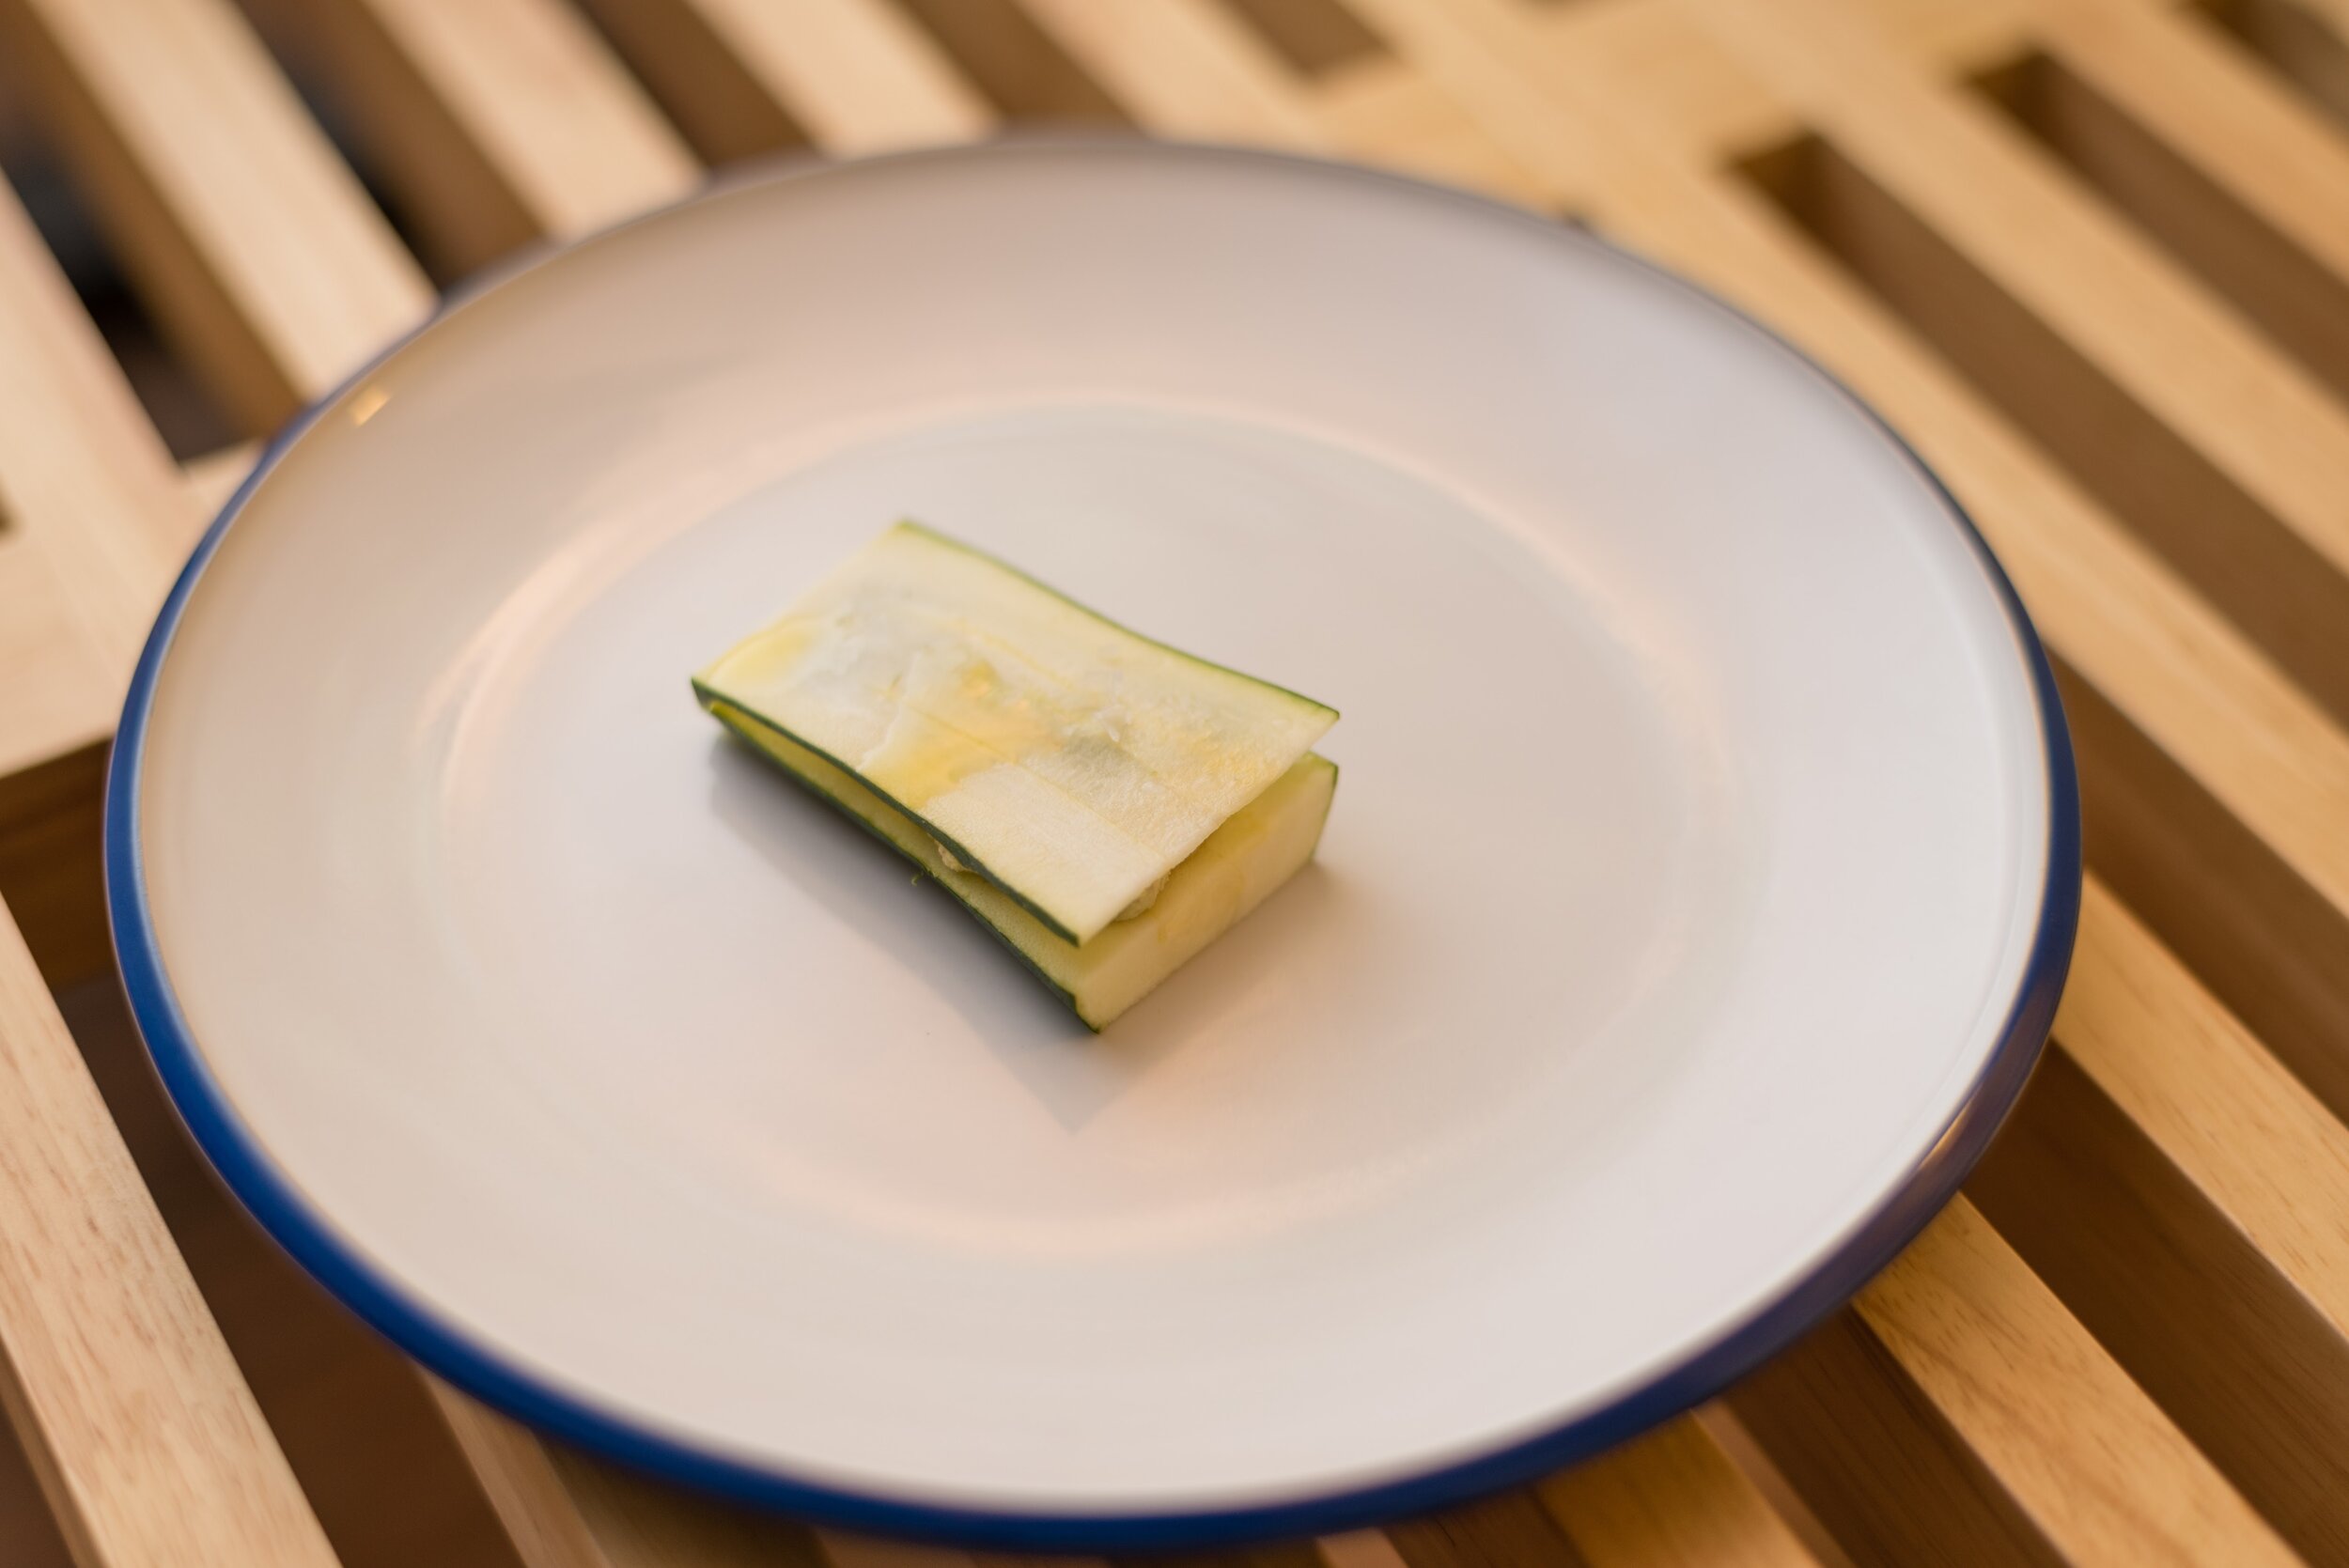
Zucchini, pistachio cream and basil: Served cold, all ingredients were prepped in advance and stored in the fridge. When my guests arrived, I assembled the dish and then served. When I served this, I took the tomatoes for course 6 from their hot water bath and put them on the stove to sear.
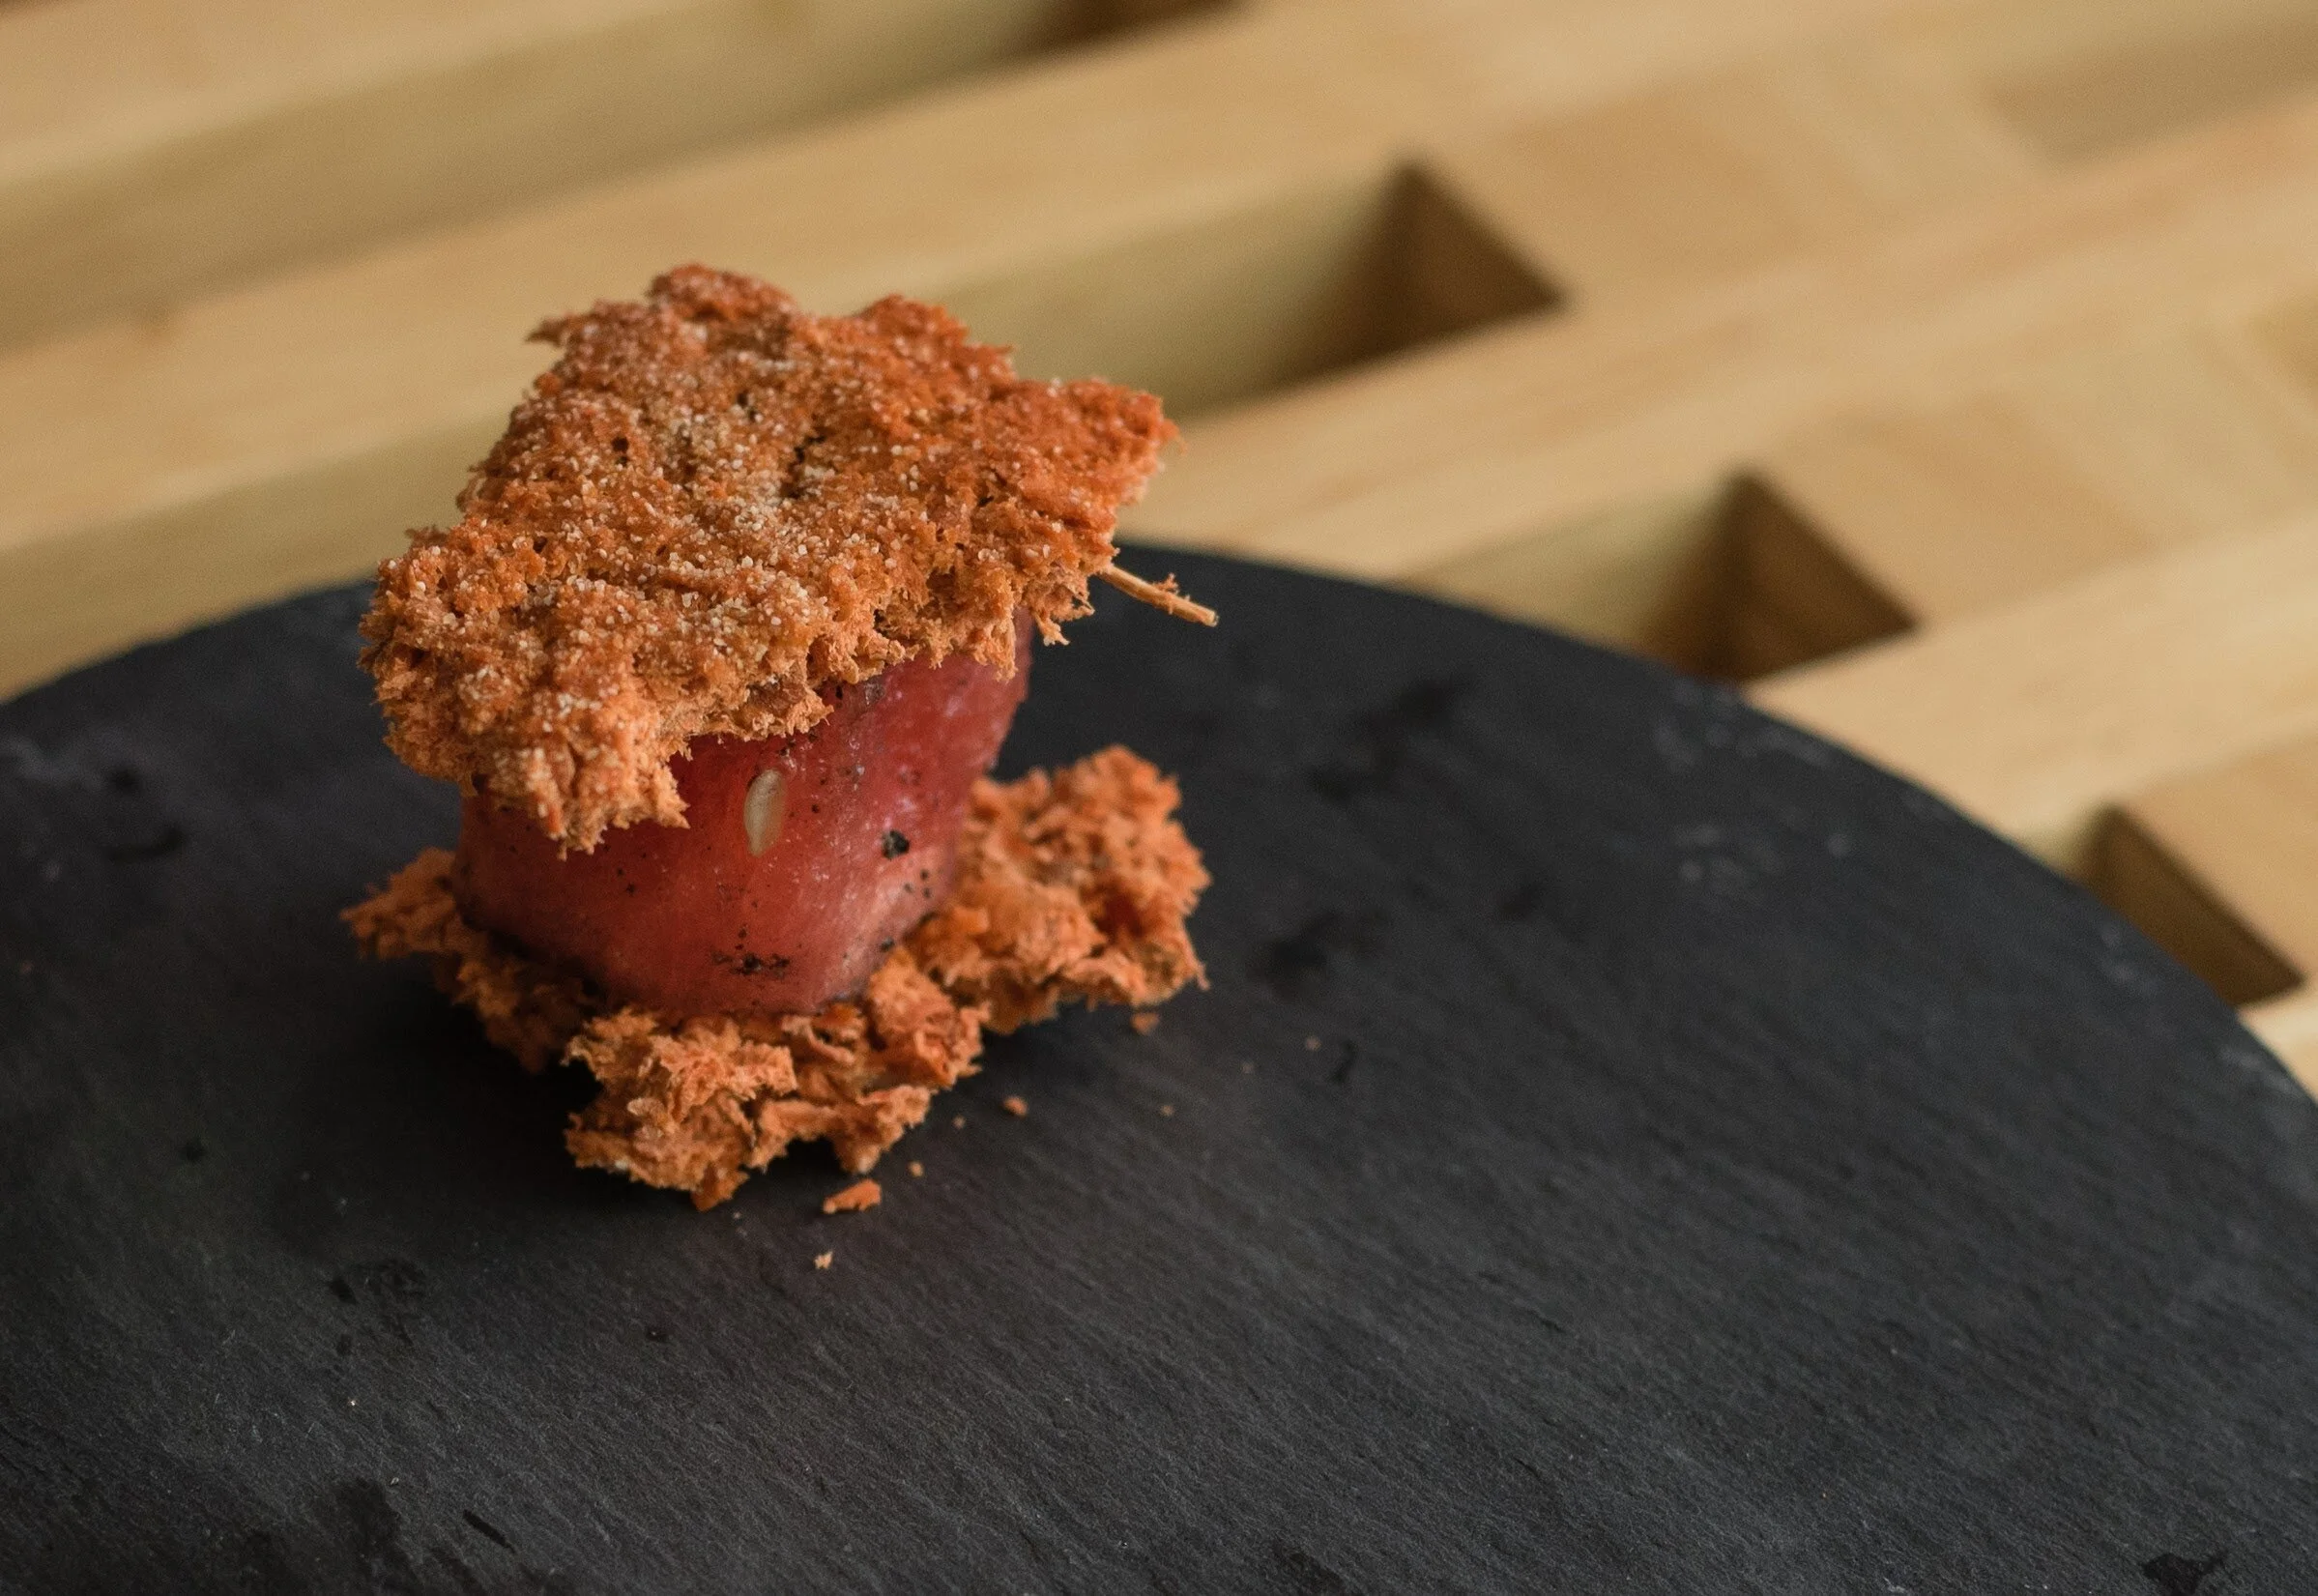
Watermelon and dehydrated carrot crisps: Served cold, all ingredients were prepped in advance and stored in the fridge. When my guests started the previous course, I assembled the dish and then served.
Shrimp in snap pea broth: Served cold, all ingredients were prepped in advance and stored in the fridge. When my guests started the previous course, I assembled the dish and then served.
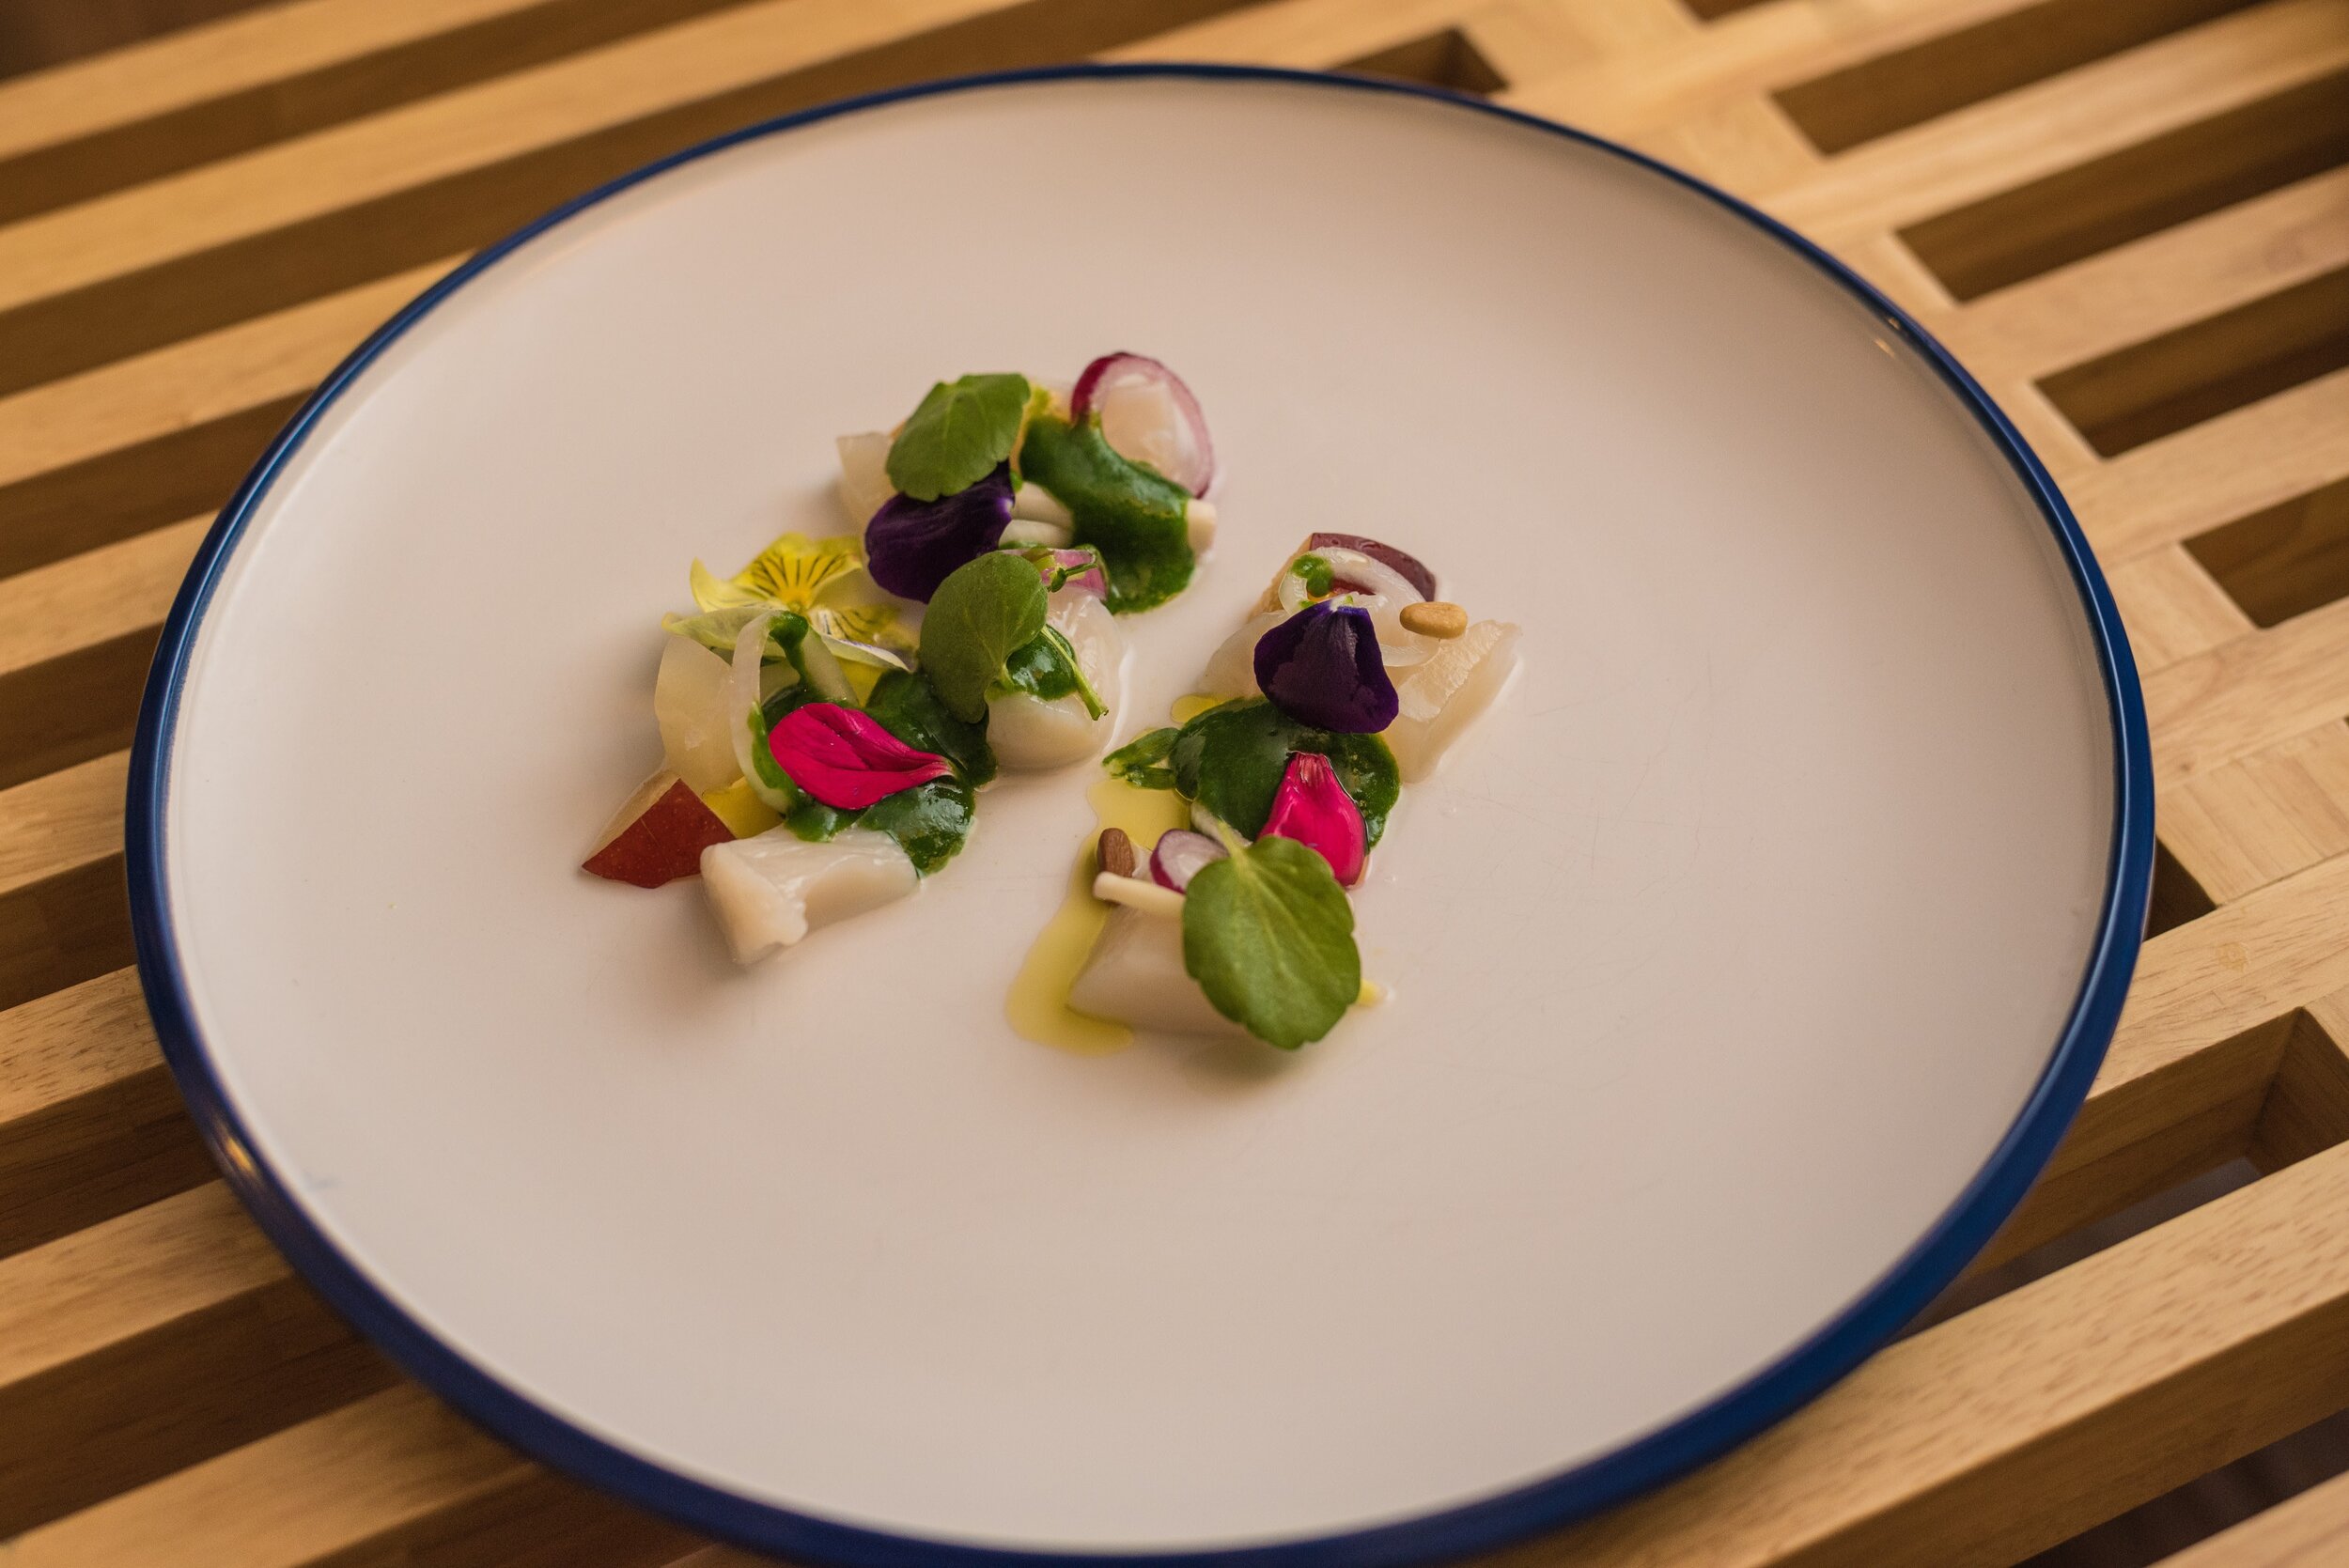
Scallops ceviche with watercress and pickled onions: Served cold, all ingredients were prepped in advance and stored in the fridge. When my guests started the previous course, I assembled the dish and then served.
Oat bread with browned butter: Ready to go.
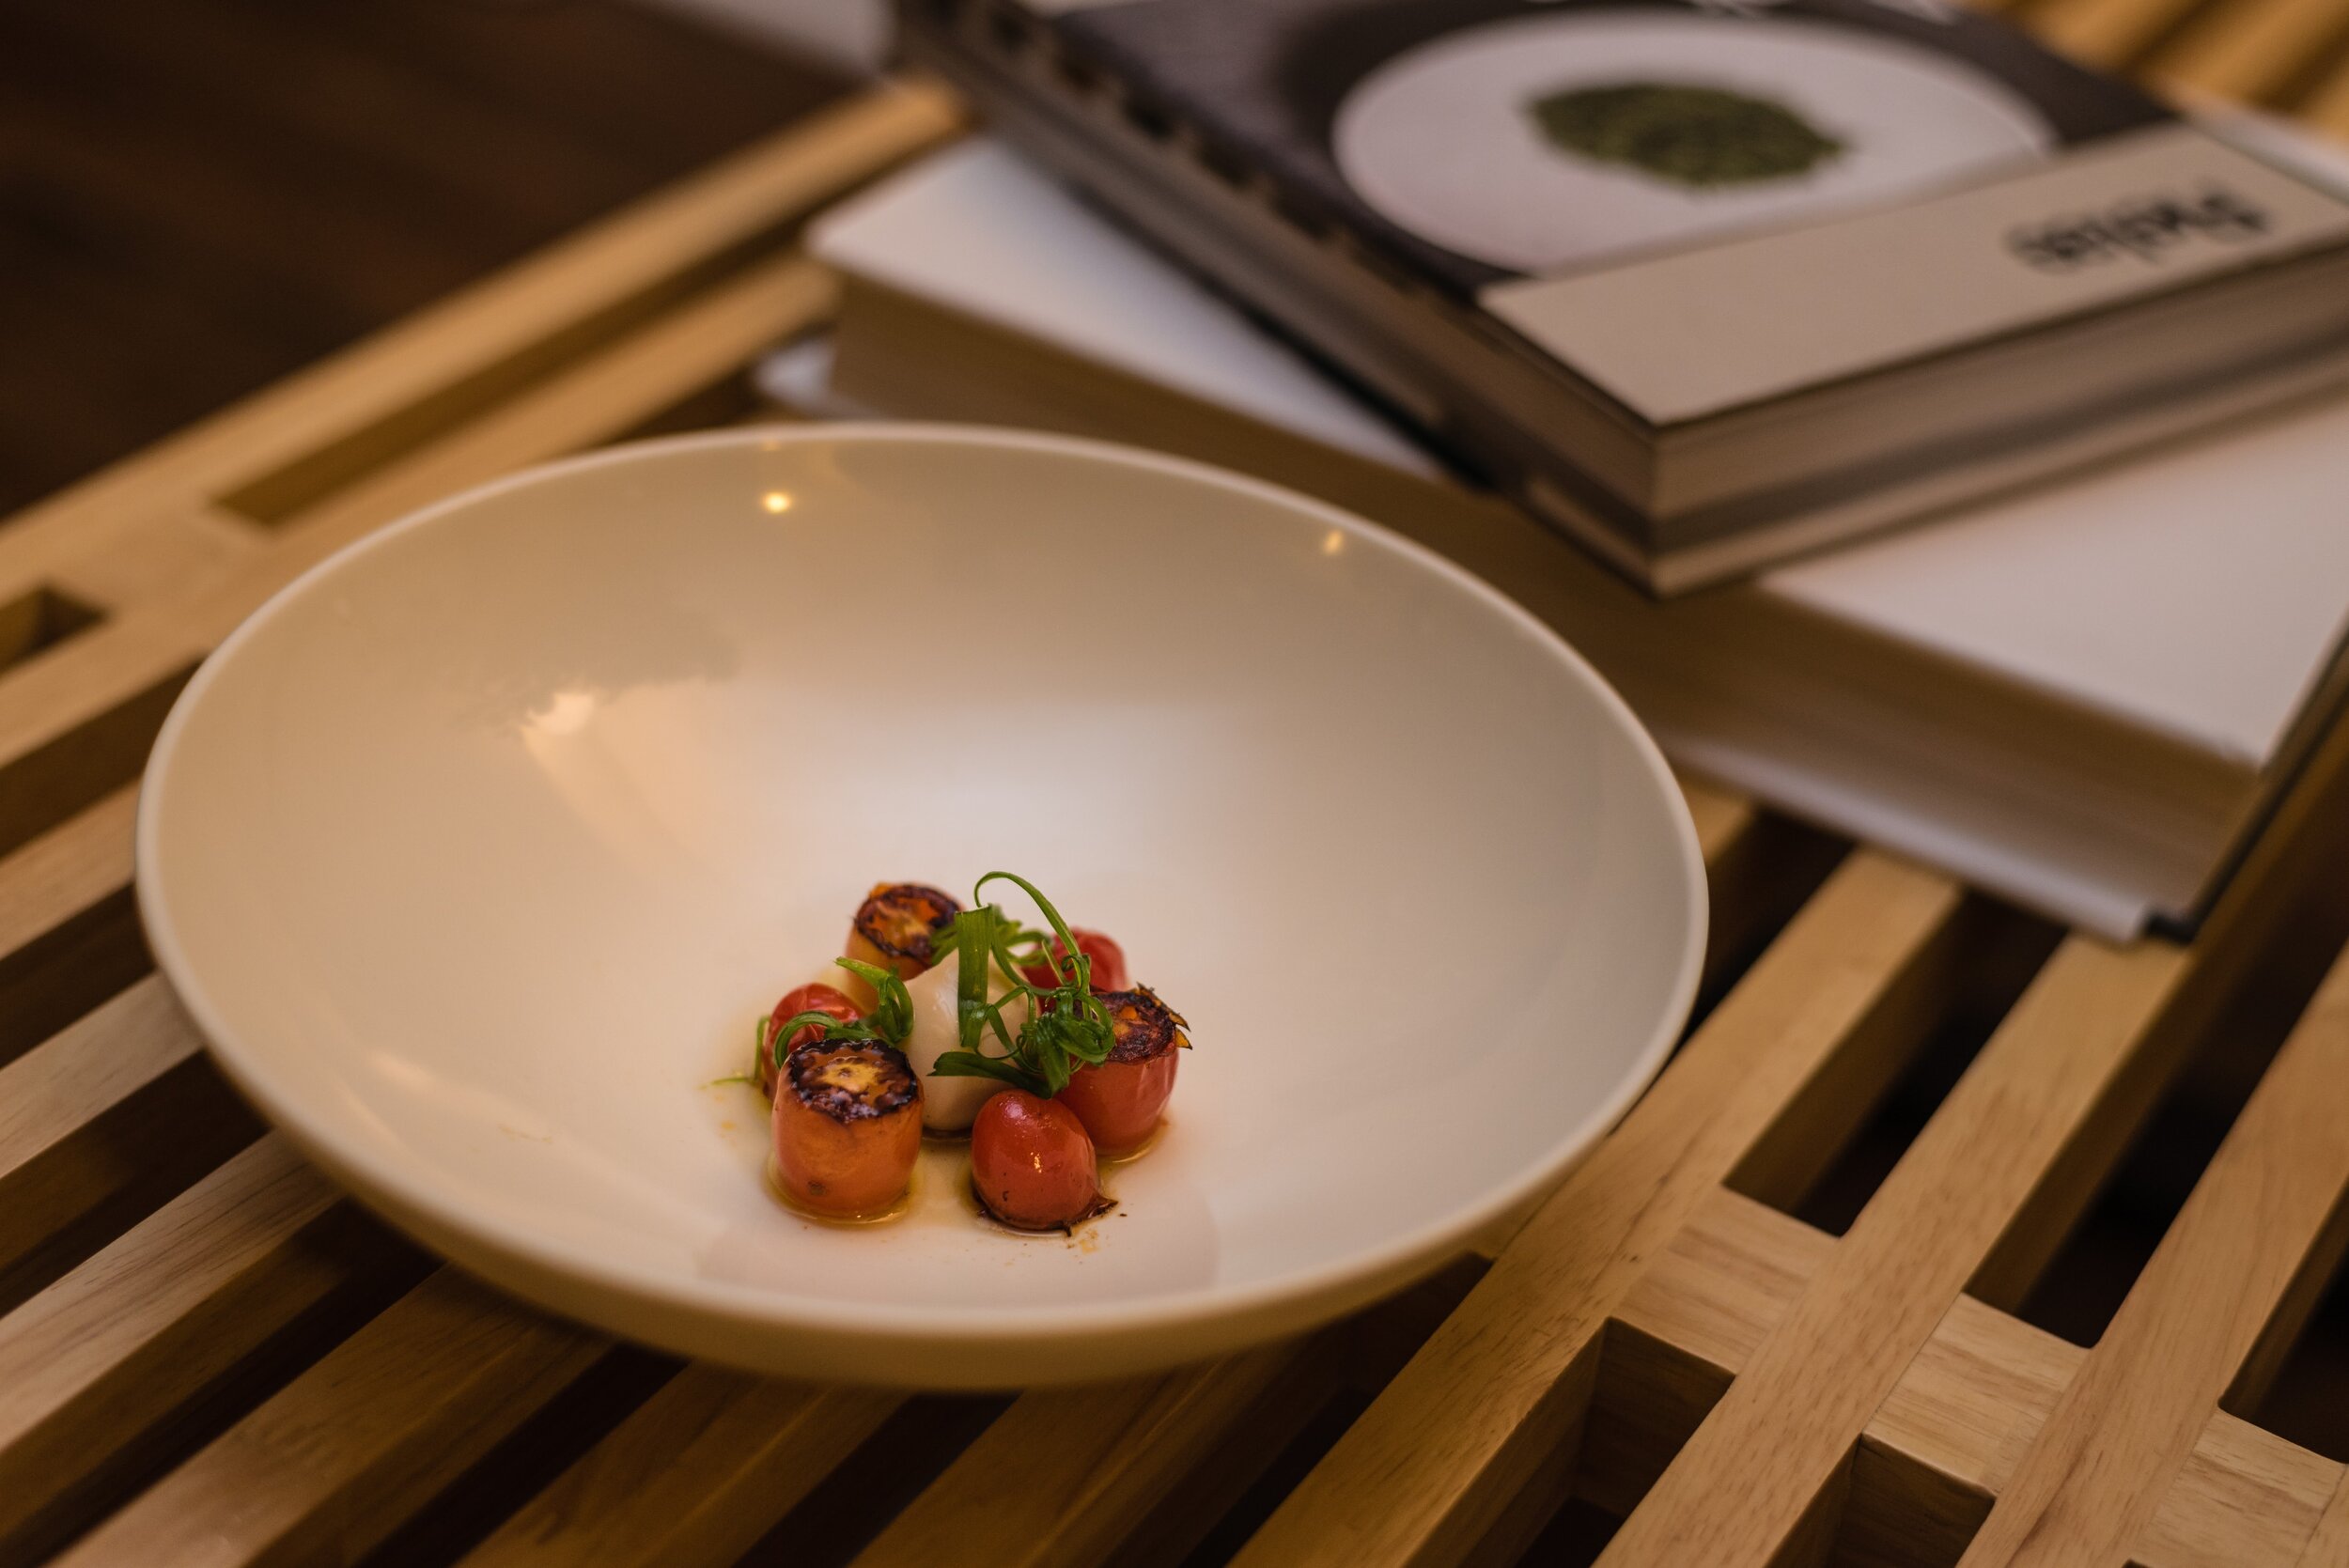
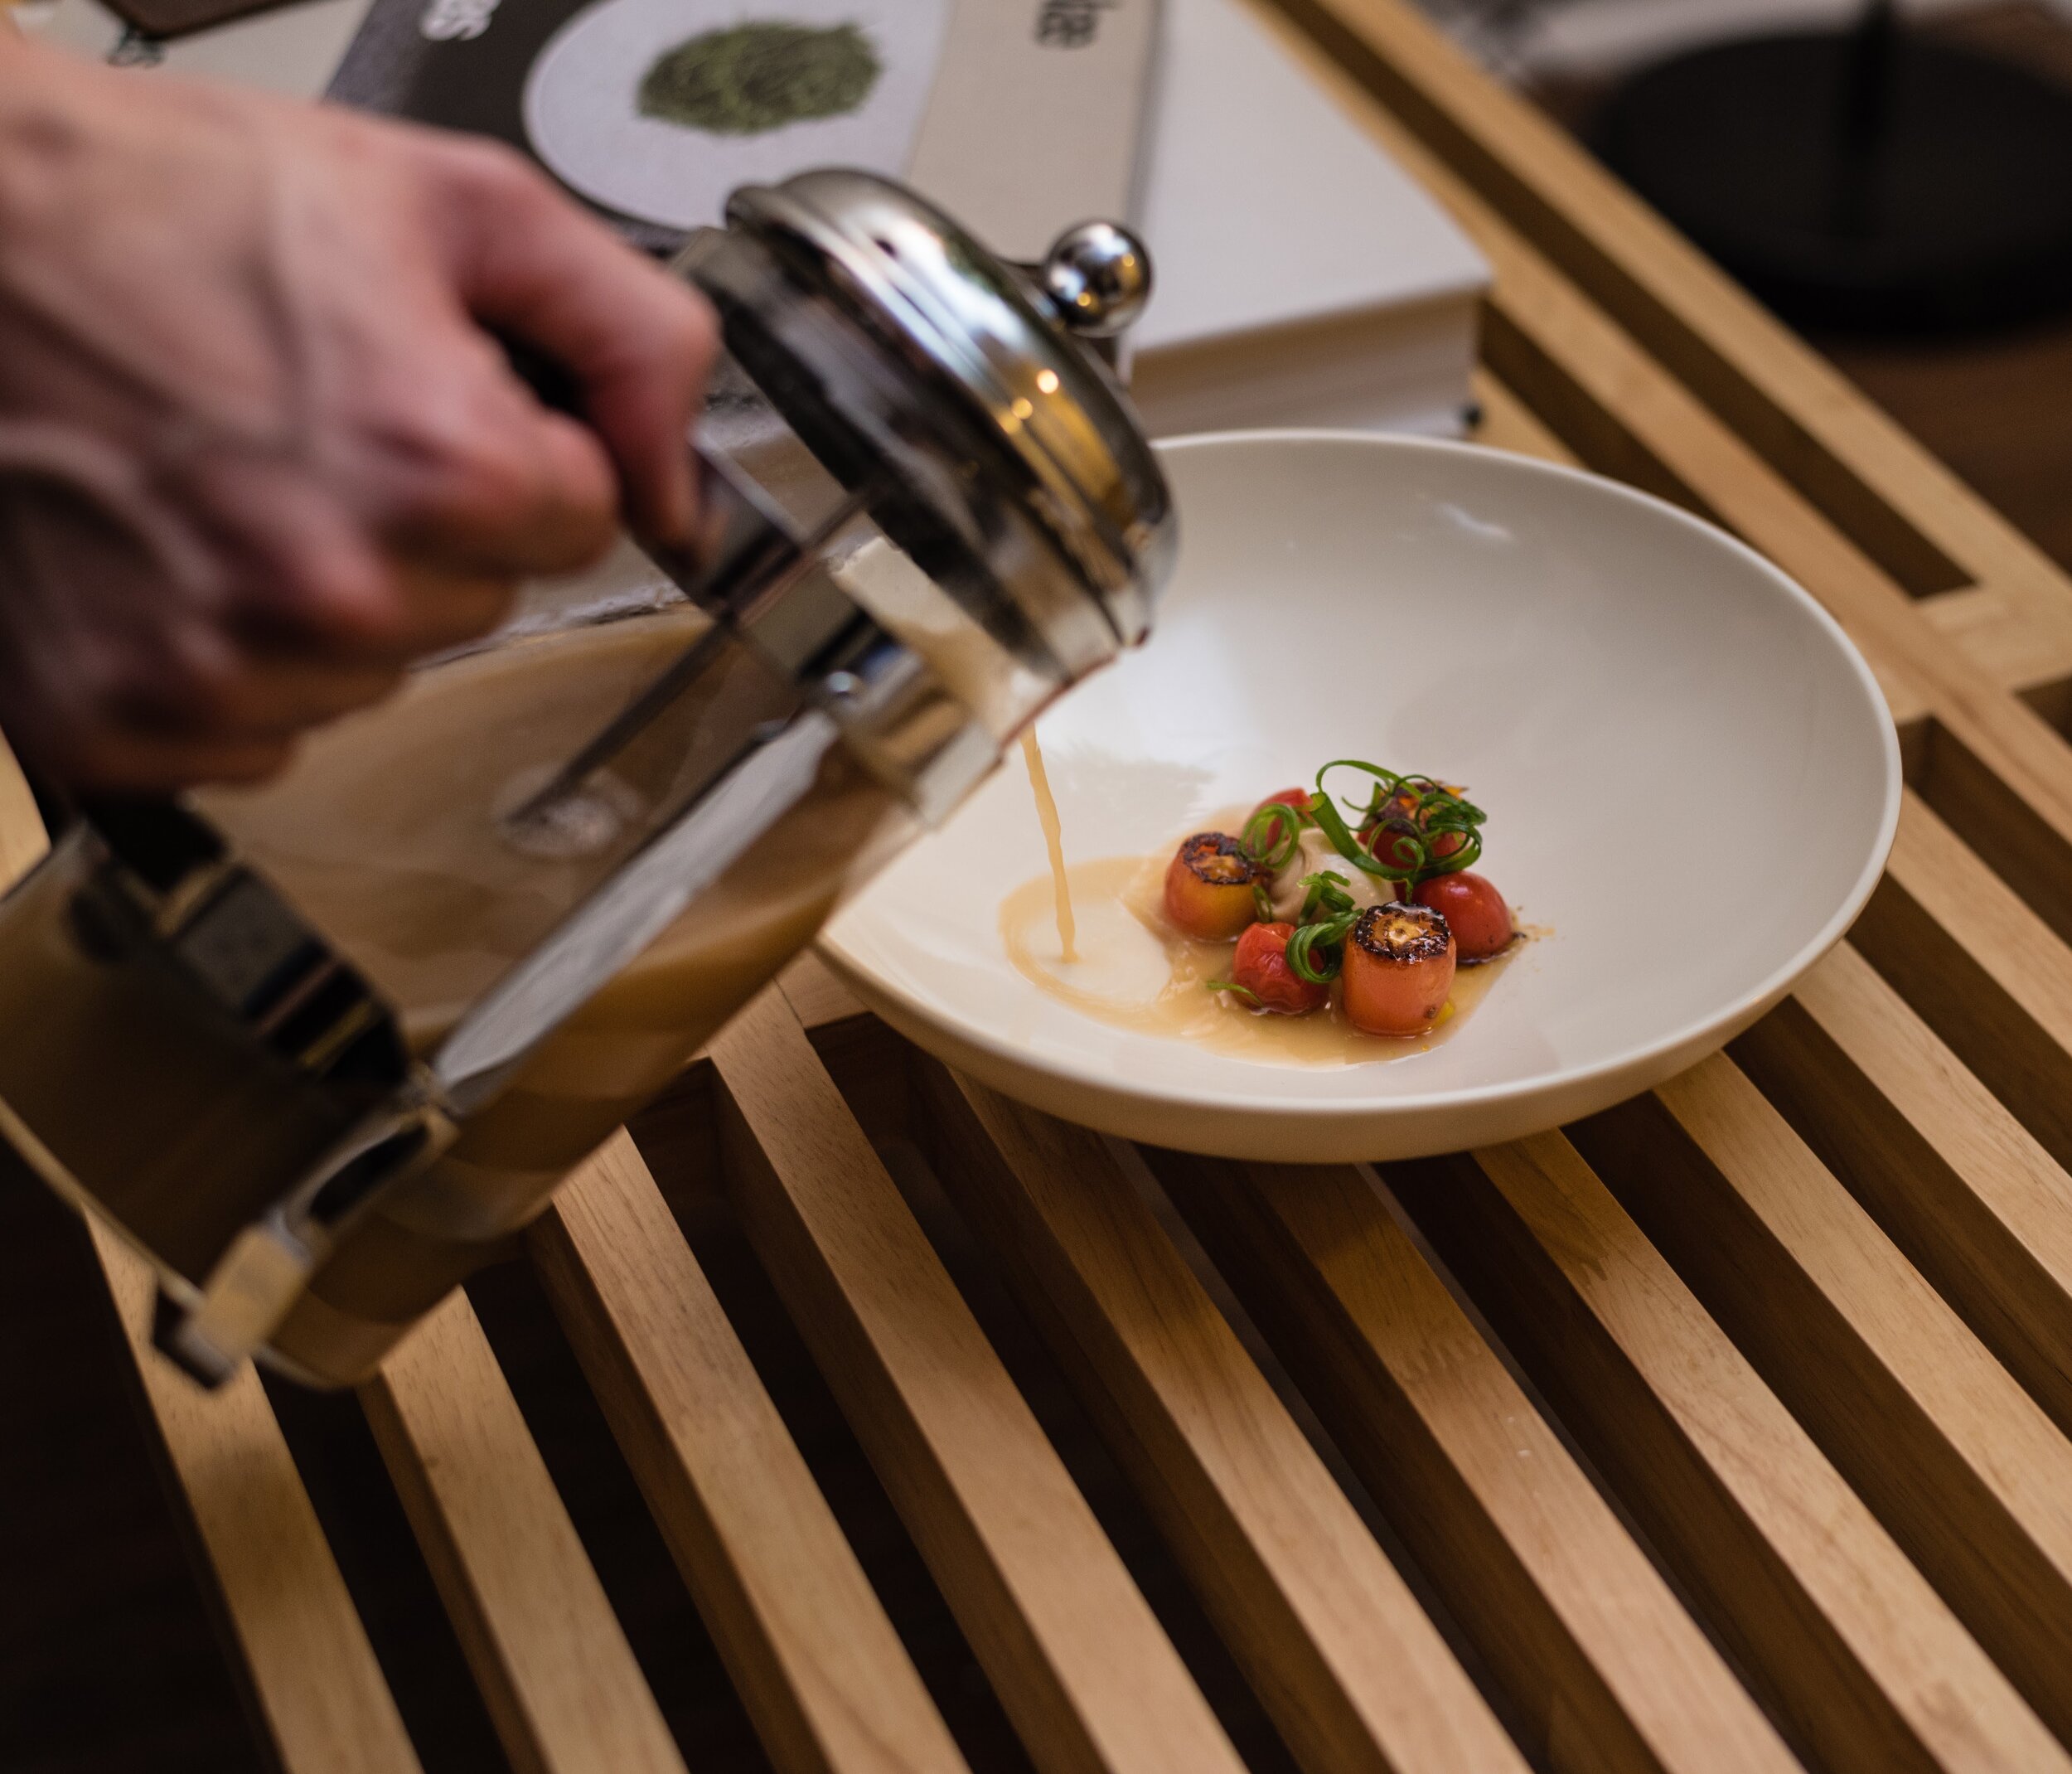
Tomato confit in tonkotsu broth: Served warm, prep began for for this course before my guests arrived. I kept the tomatoes warm with my immersion circulator for the first courses, then seared them just in time for this course. I poured the tonkotsu broth table side (theatrics!) after bringing to a simmer a few courses before. The garnishes were cut in advance and kept in the fridge.
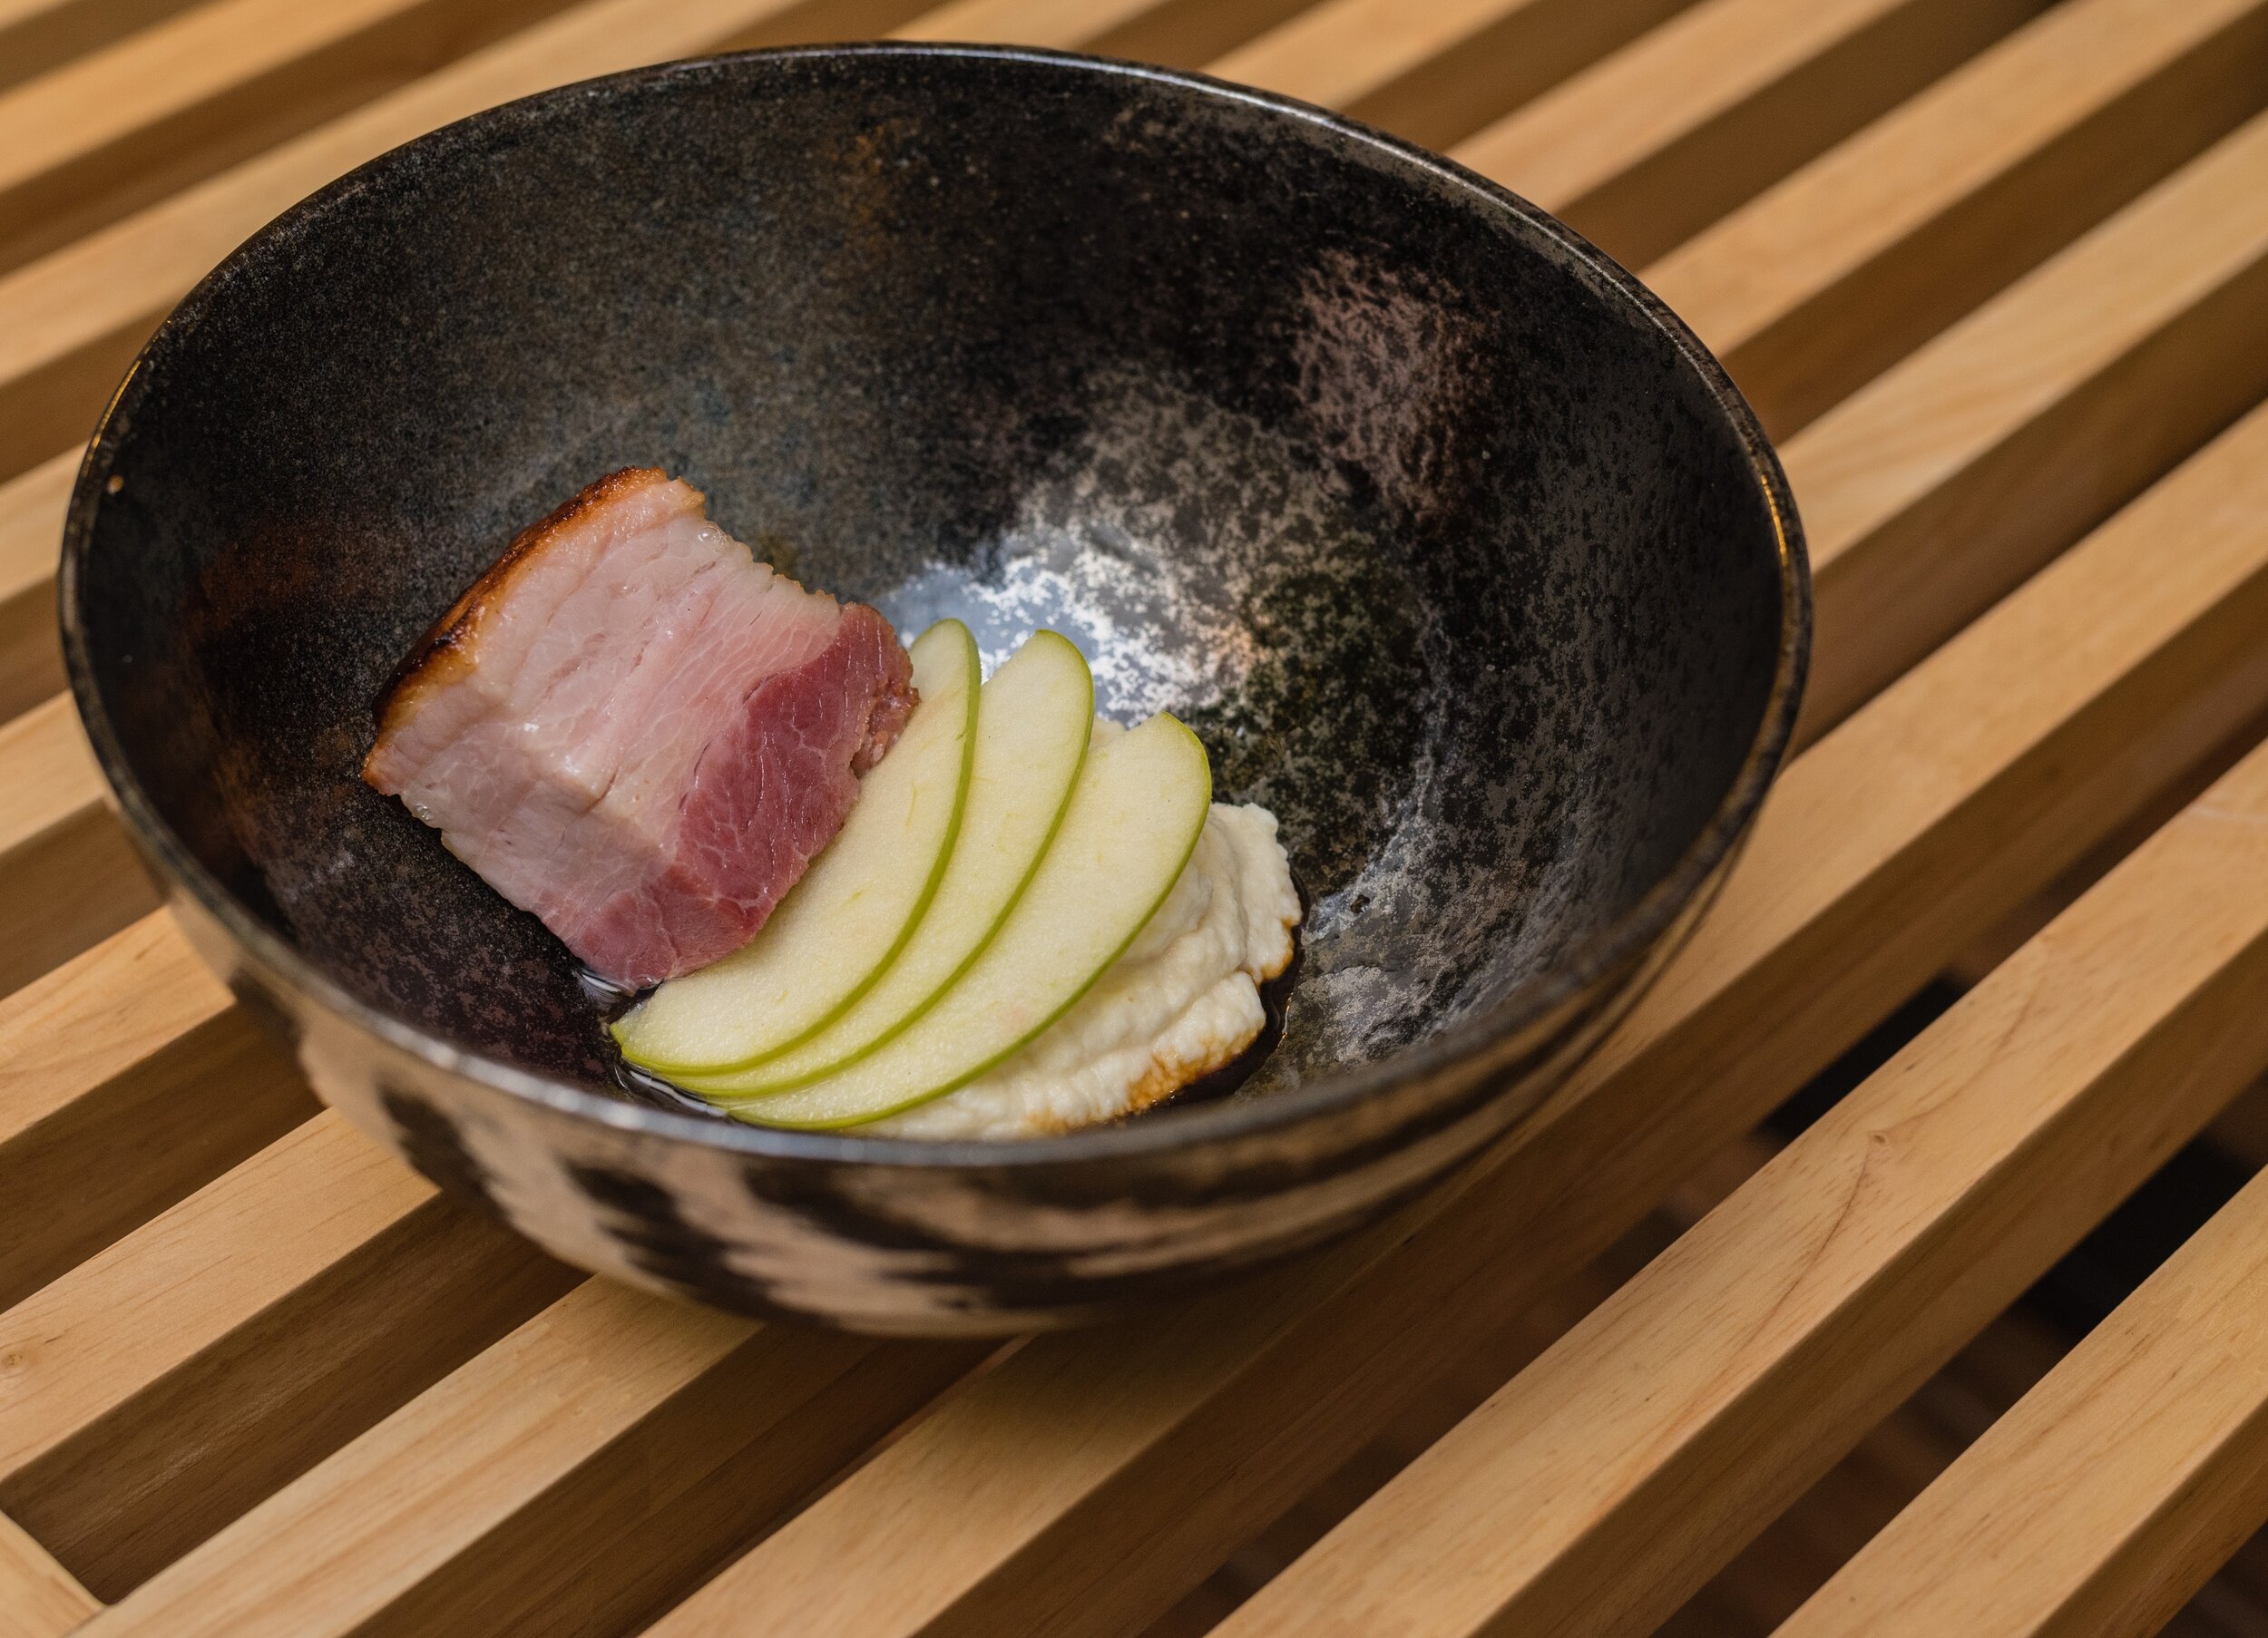
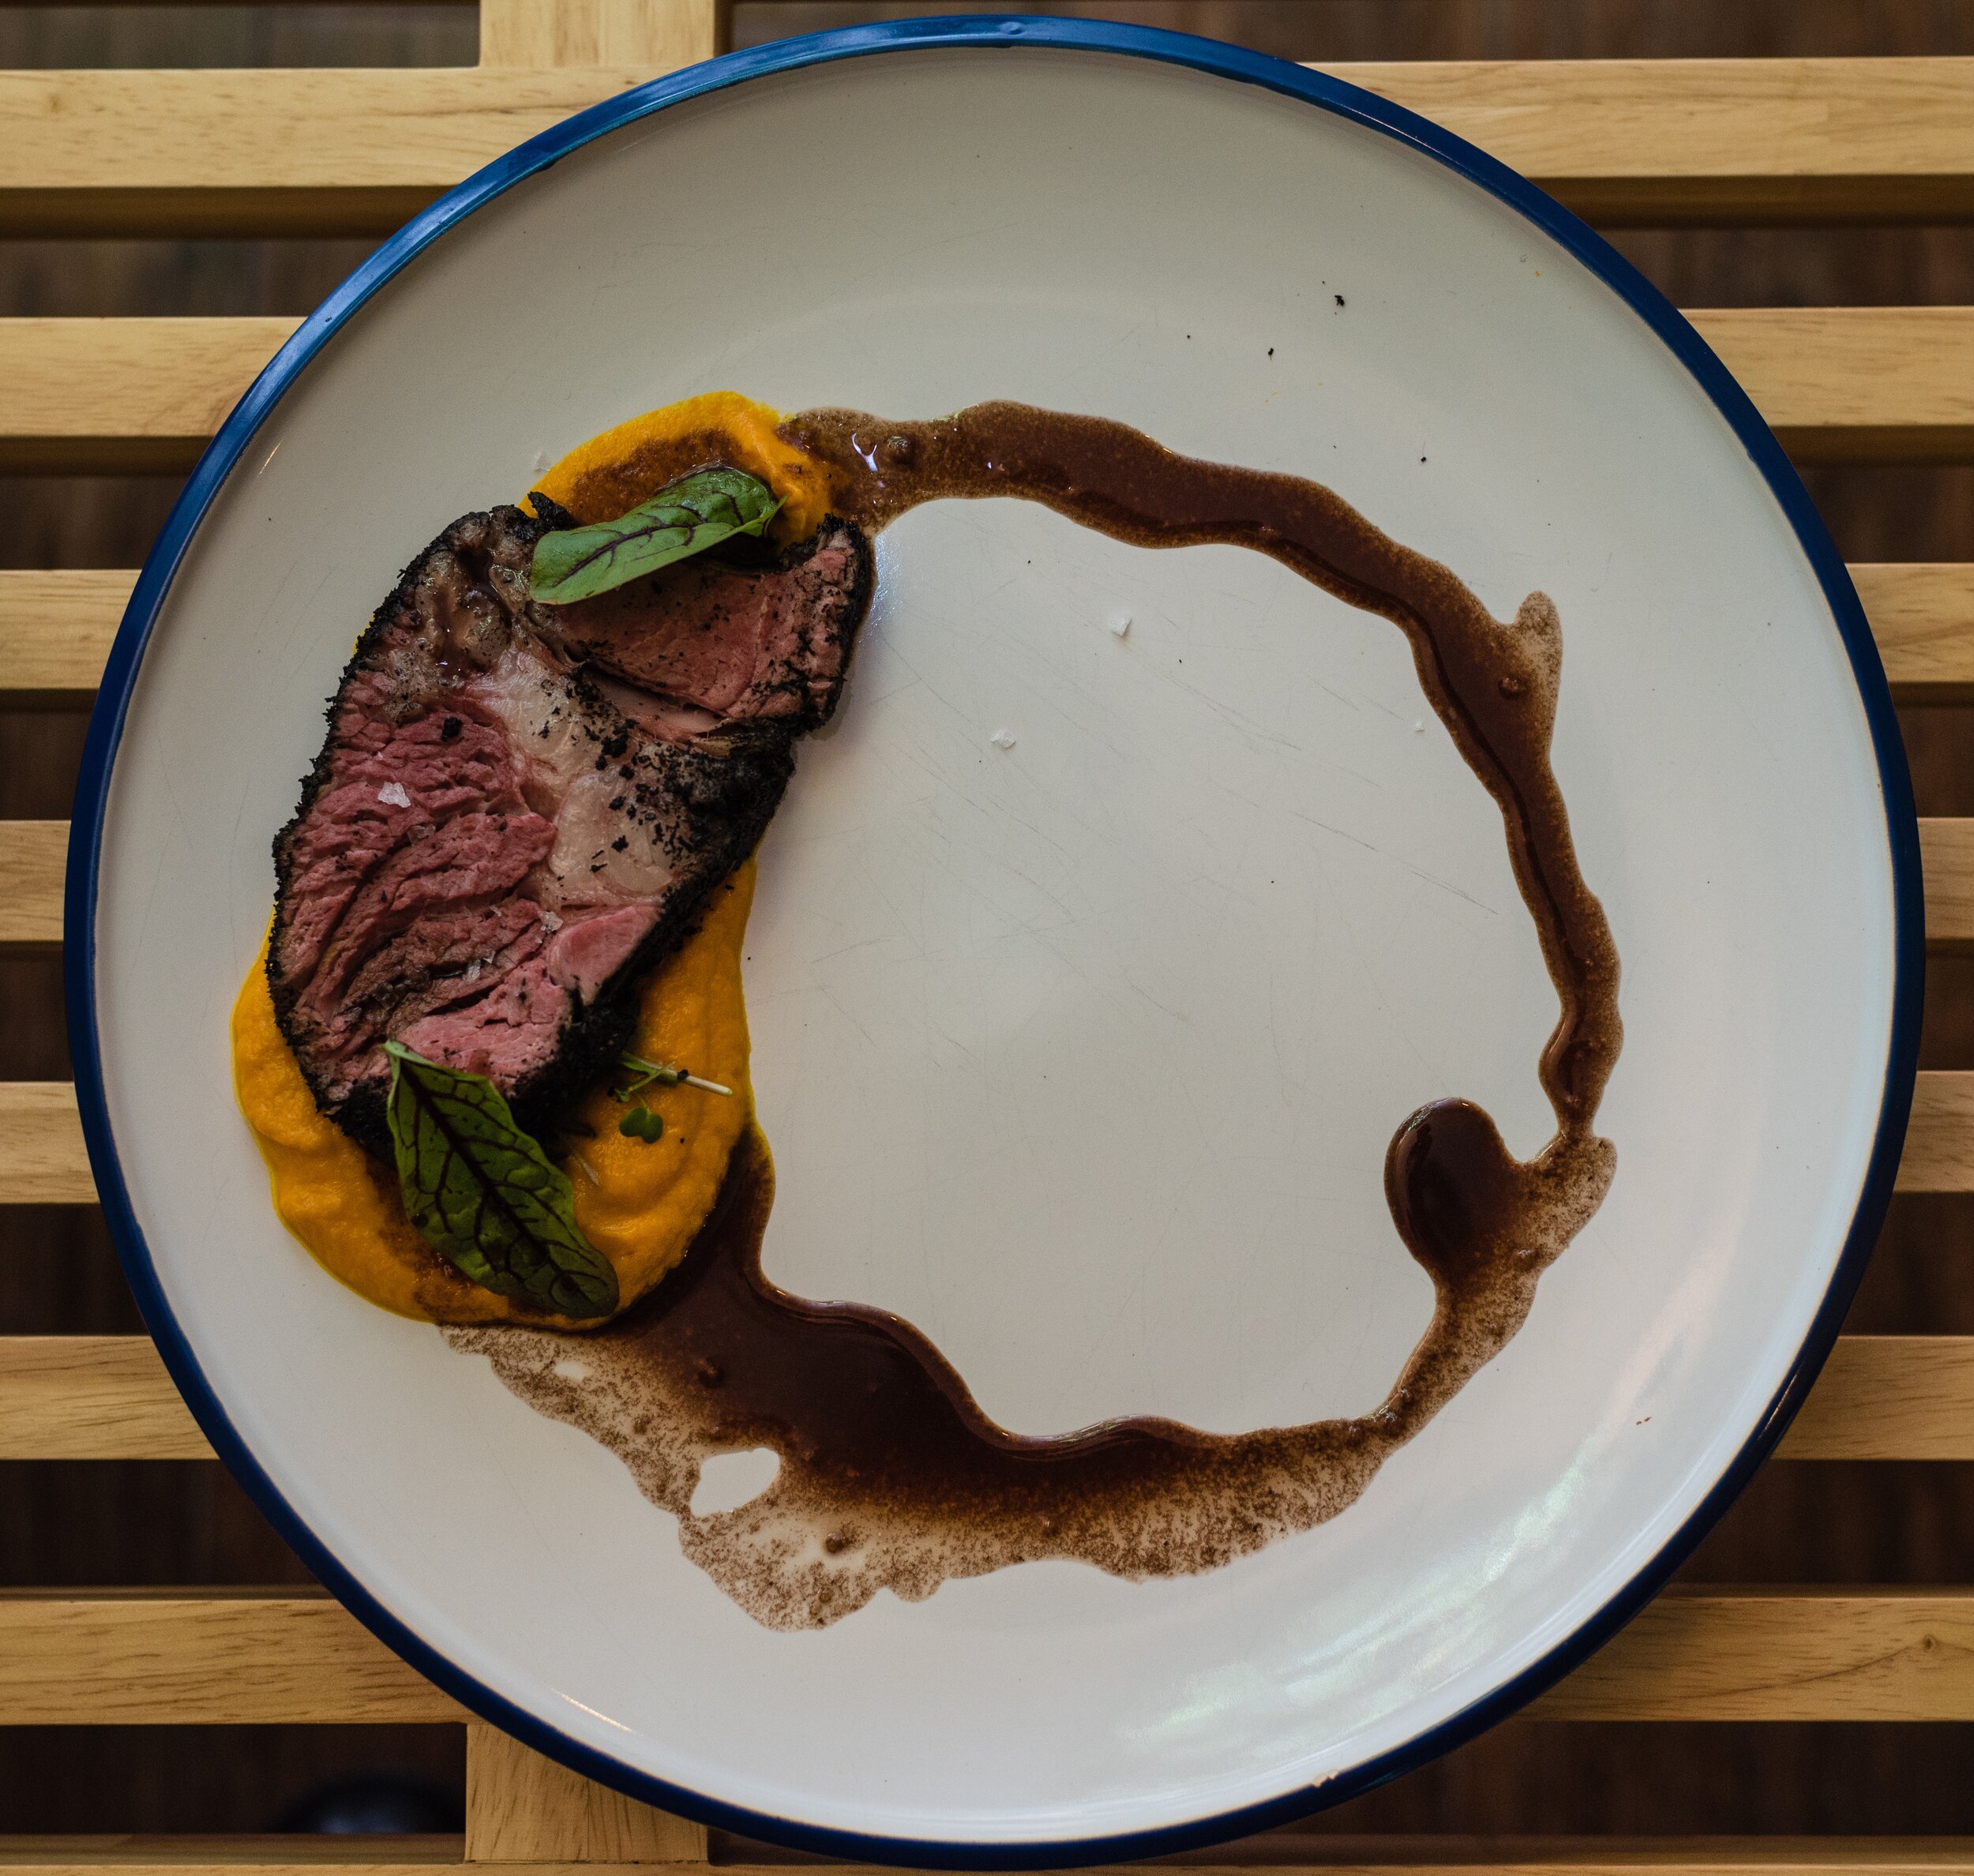
Pork belly with black garlic tare and celeriac puree: Served warm, the pork belly was cooked sous vide the day prior. A few courses earlier, I added them to the oven to brown. I cooked the celeriac puree that morning and rewarmed it with the immersion circulator a few courses prior. The other ingredients were pickled and kept at room temp.
Boeuf bourguignon: A ChefSteps recipe, this was cooked for 24 hours sous vide. The 24 hours ended as soon as the course was ready. I chose this recipe because it uses a burnt onion powder to create the appearance of a sear without actually requiring a sear. The dish was served with a carrot puree that I cooked on the stove. My last remaining burner was used to warm a sauce, and the other ingredients were pickled and kept at room temp.
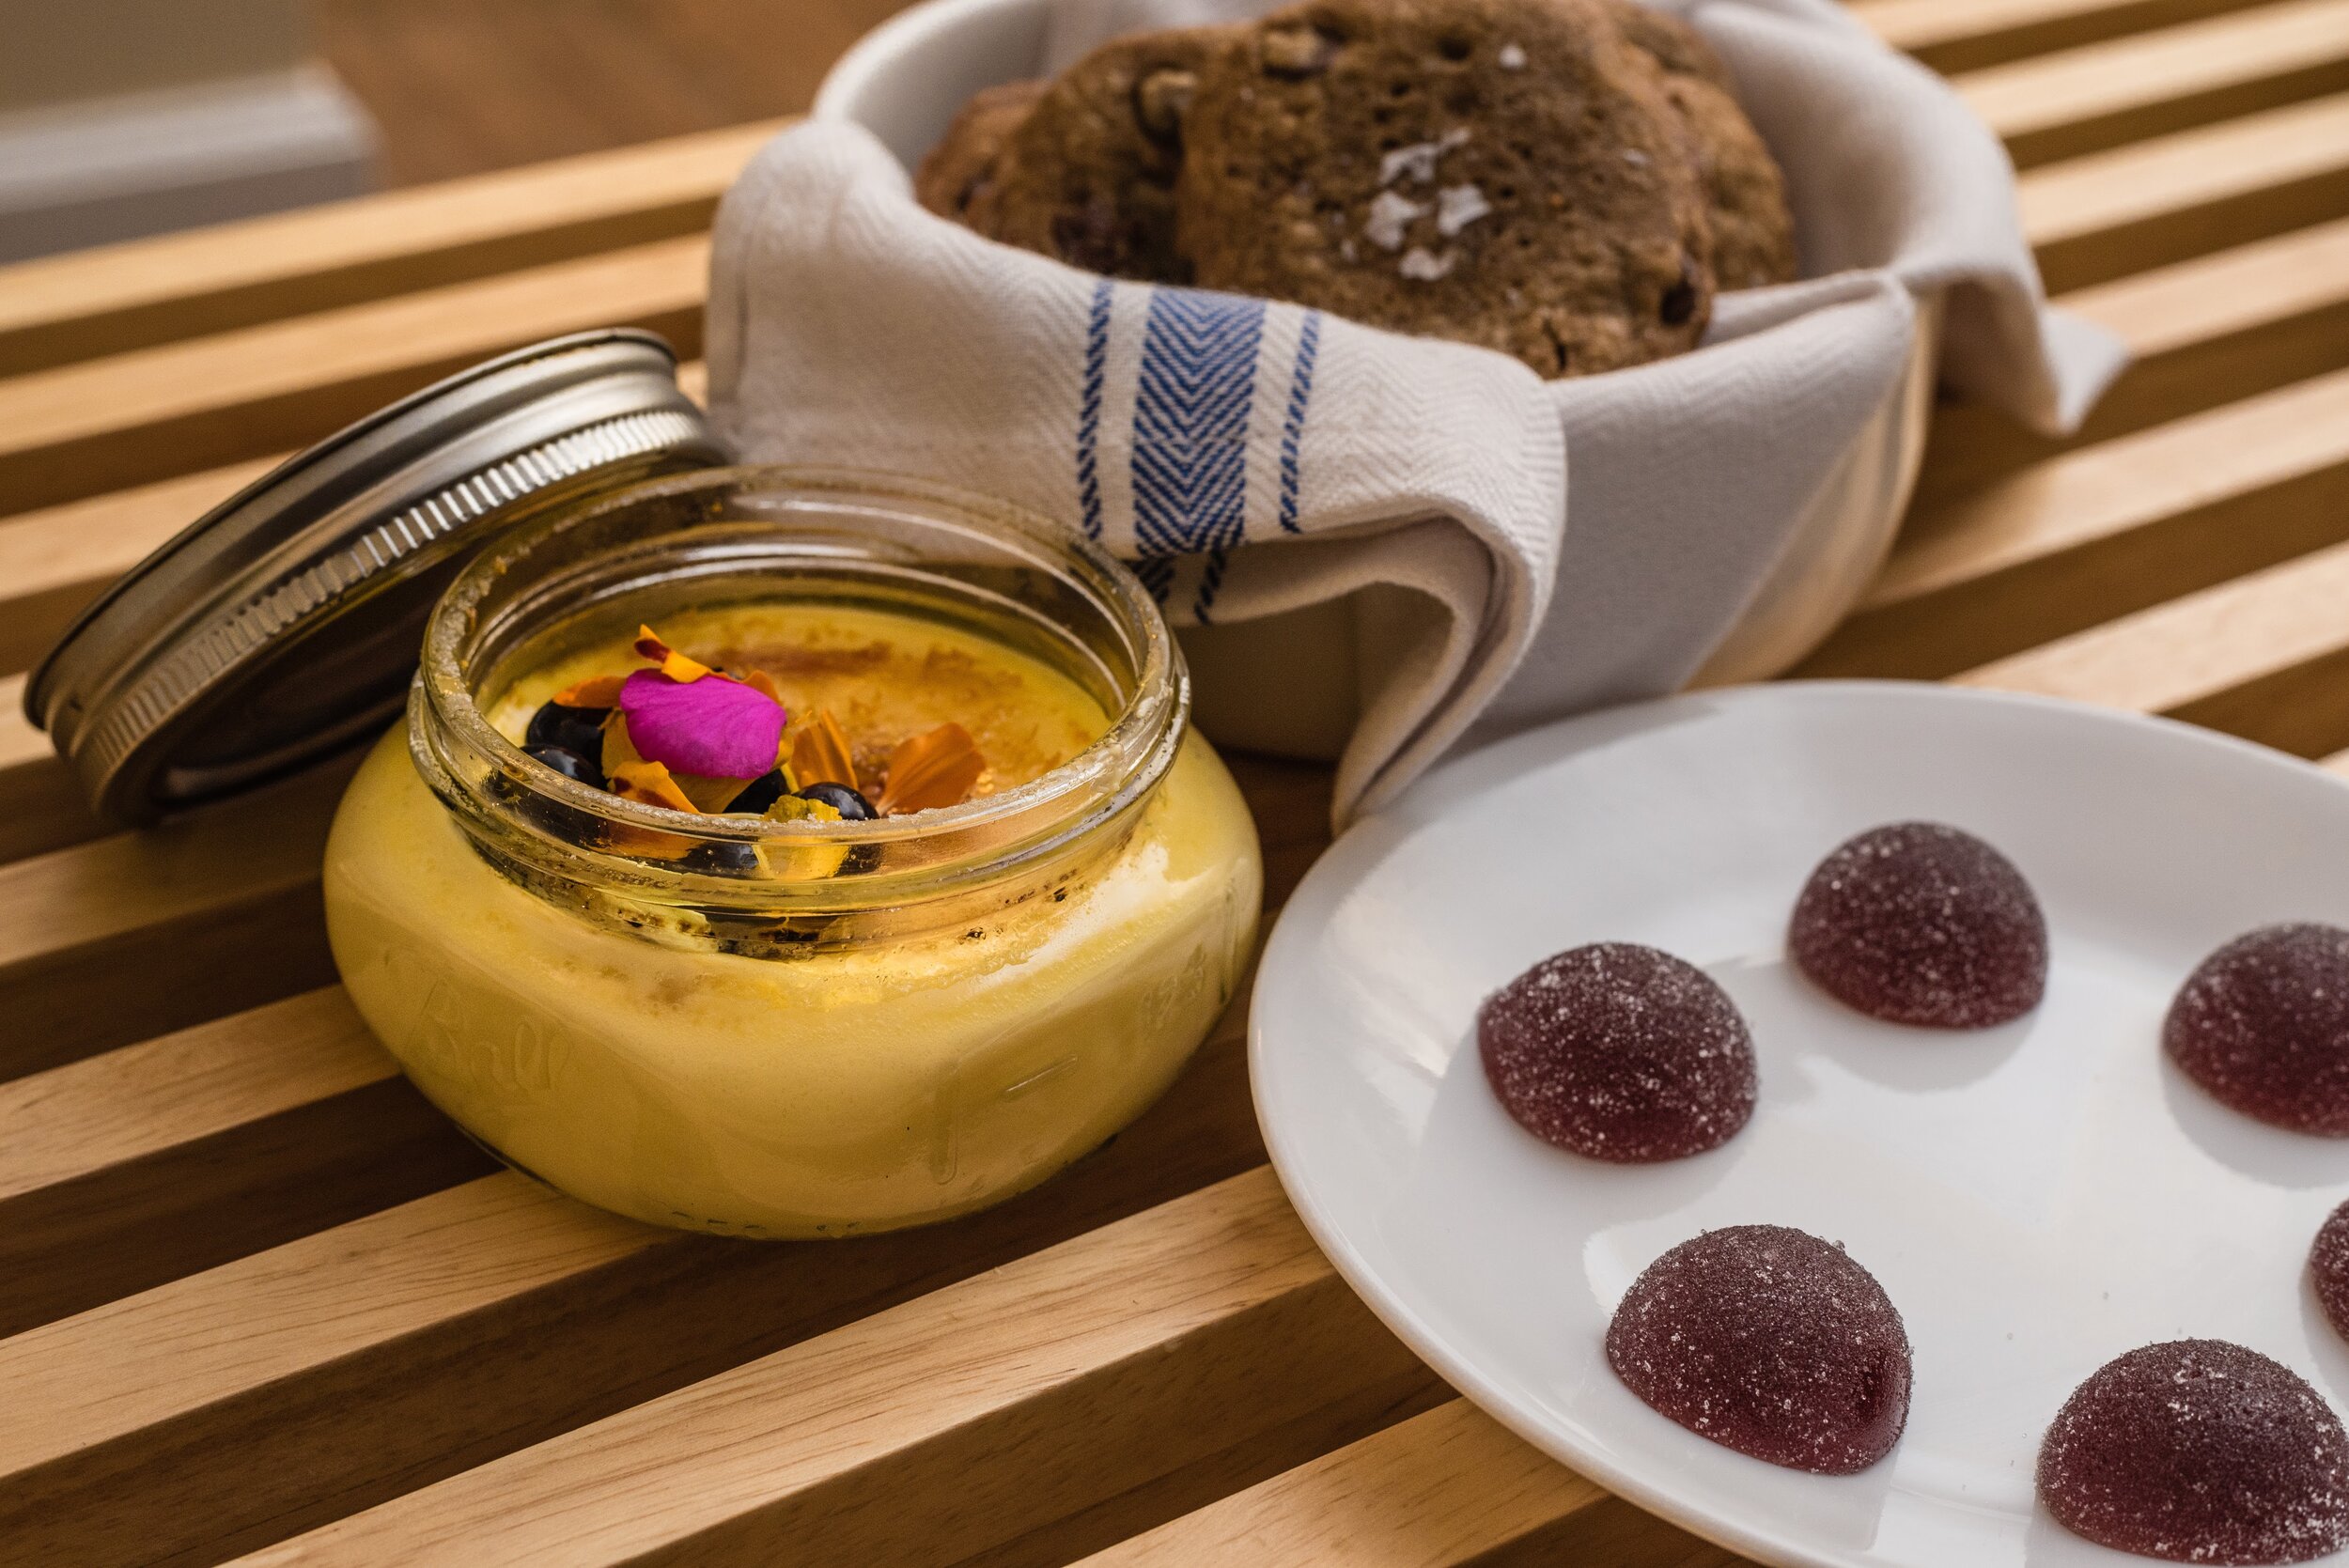
Creme brulee with birch syrup blueberries: I prepped this in advance and kept it in the fridge. As my guests were eating the beef, I was blowtorching the sugar.
Chocolate chip cookies and red wine gummies. A fun petit four to close things out. All prepped in advance. By the time my friends had finished dessert, I was practically done cleaning! Time to bust out the wine.
Hope this can serve as a decent guide. Good luck!