Epic Roast Duck Recipe
This recipe for oven-roasted duck achieves it all: crispy skin and perfectly uniform medium-rare meat. And it’s surprisingly easy to make at home.
I’ll admit it: most oven-roasted duck recipes aren’t very tasty. If the skin is crispy, the meat is dry. If the meat is medium-rare, the skin is soggy. Restaurants like Eleven Madison Park succeed where these recipes fail, but they do so by using fresh, small ducks (half the size of the ones consumers can typically buy in stores) and dry-aging those ducks in a special environment for two weeks prior to cooking.
I sought to make a roast duck recipe that has crispy skin and meat that looks like it was cooked sous vide. It works with the whole large ducks you can find in supermarkets (~5.5 lbs) and doesn’t require special equipment (other than a convection oven). After a few attempts, I’m pretty pumped with where I landed.
The secrets
Here’s what makes this duck recipe work so well:
We’re drying out the duck for multiple days before cooking. The key to crispy skin is dry skin, and a standard refrigerator is perfect for wicking moisture from duck skin over multiple days.
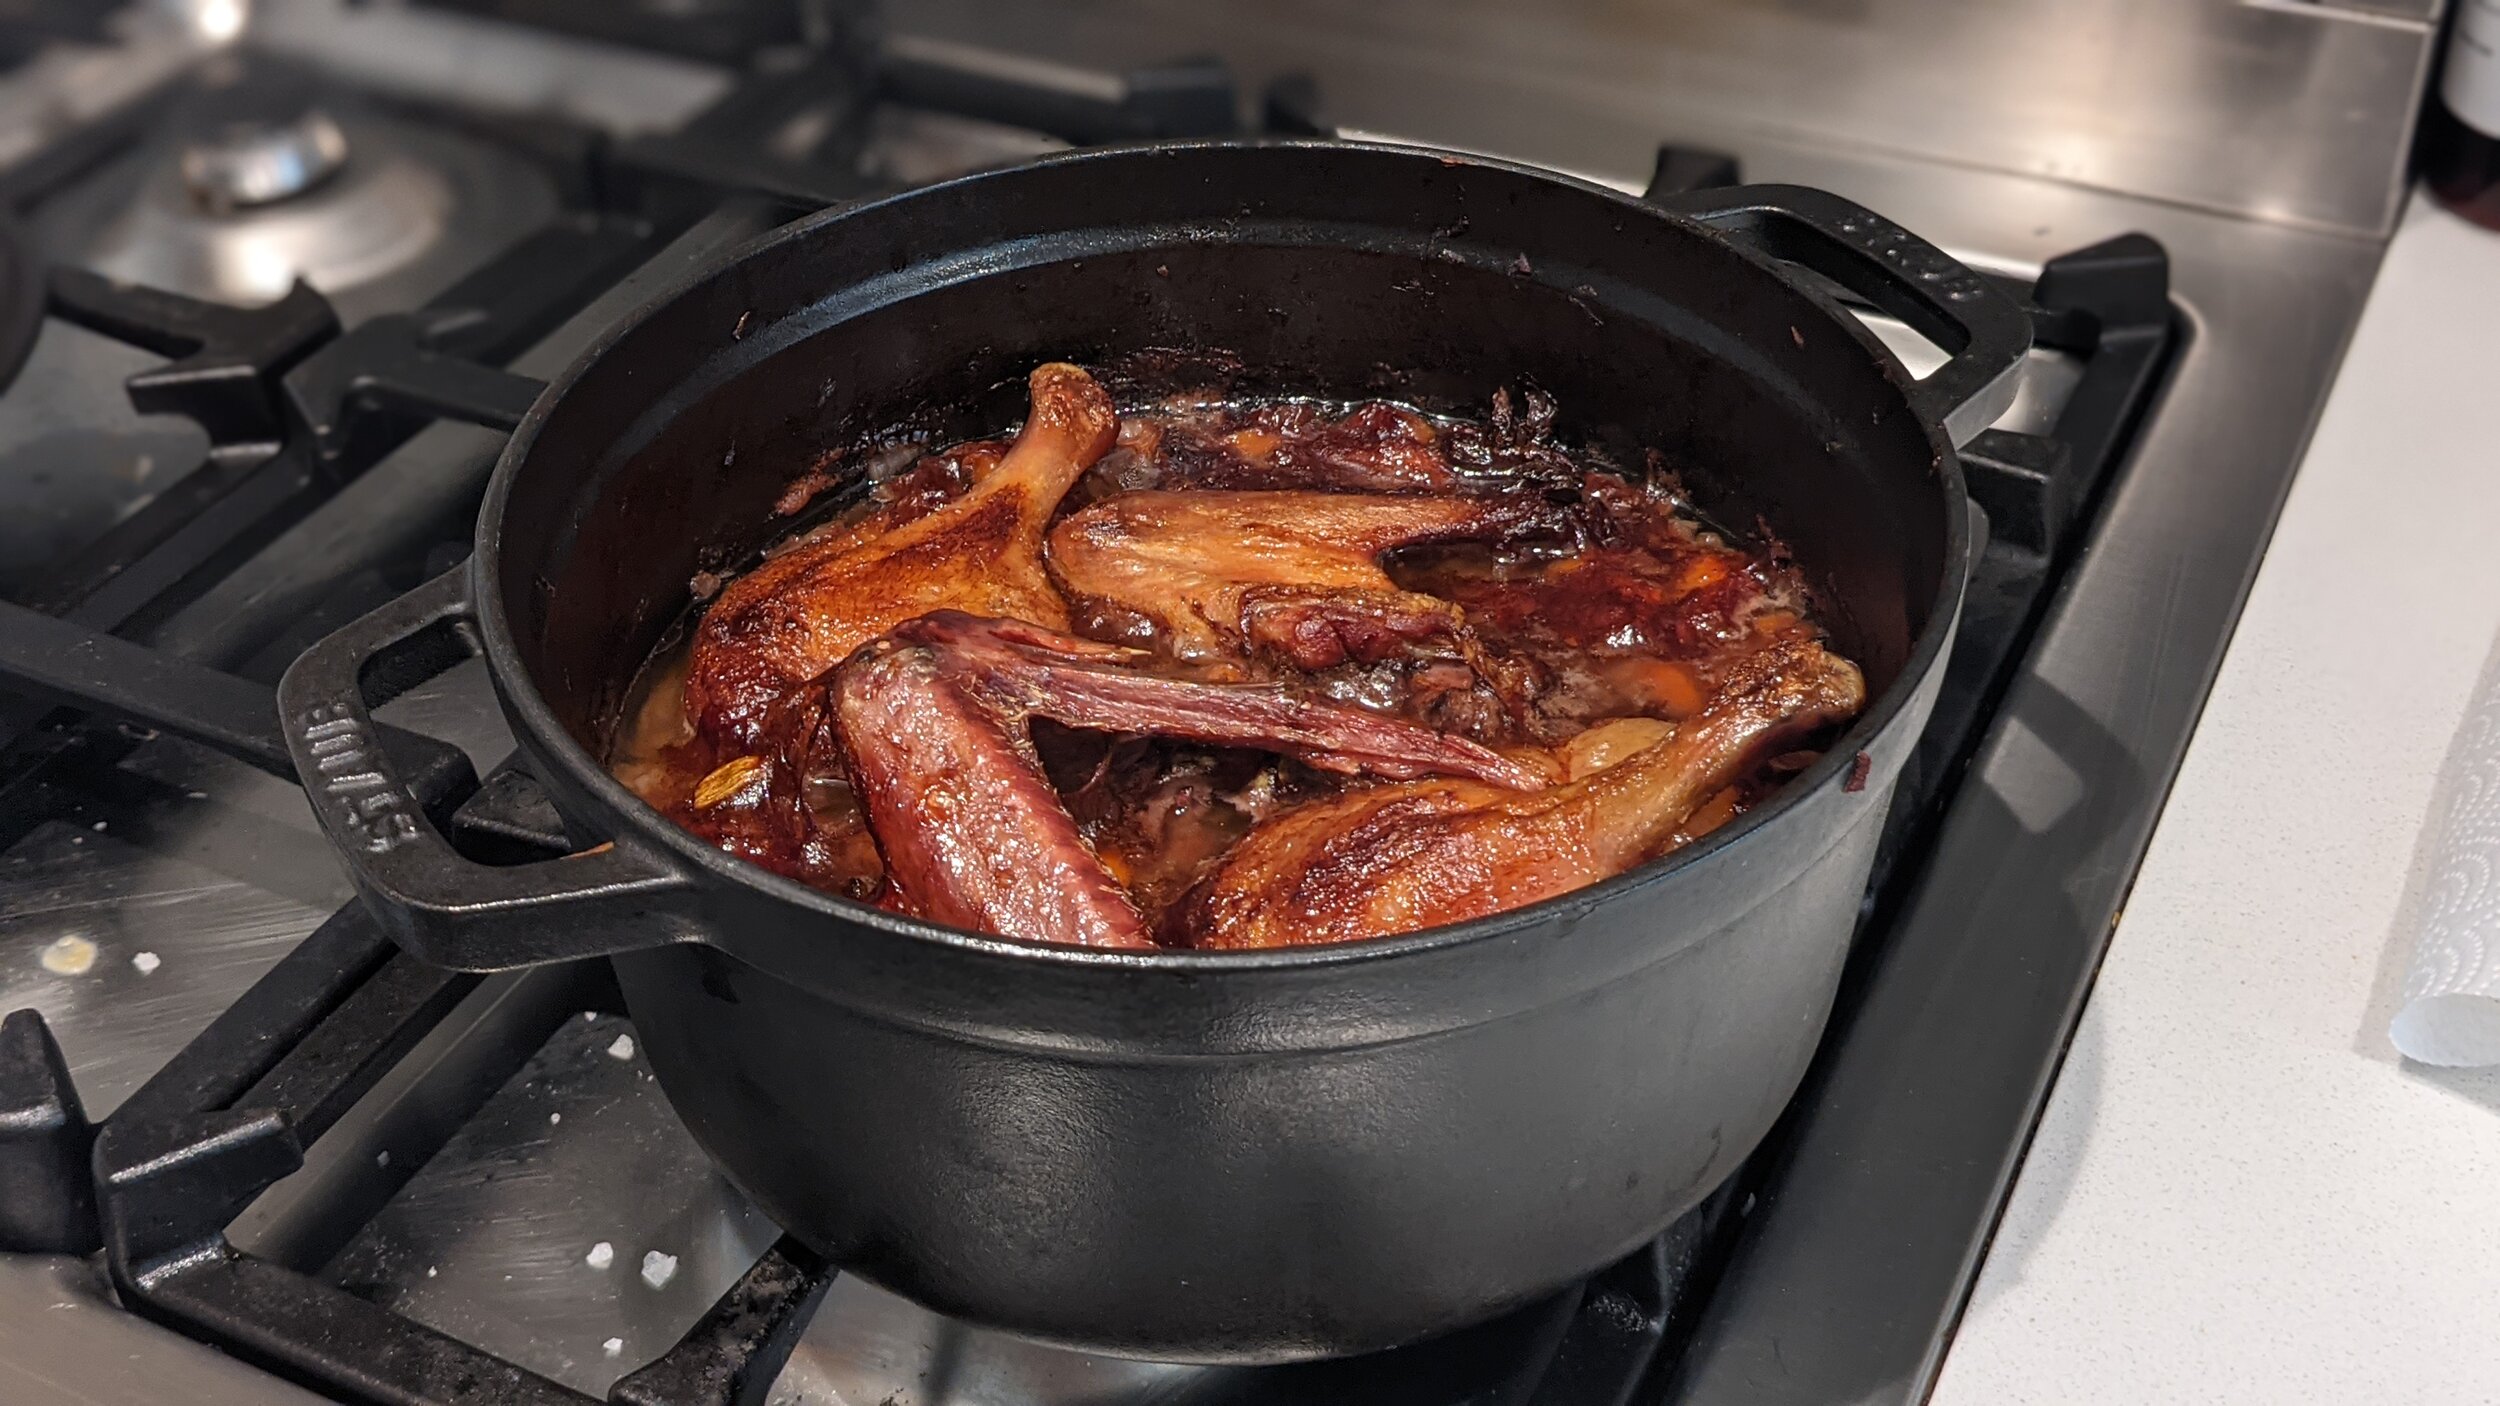
We’re only cooking the crown. Duck legs and wings don’t taste good when you cook them in the oven, so we’re removing them before executing this recipe. I recommend braising them in red wine for another meal.
The meat is cooked through residual heat. The recipe calls for multiple cycles of high heat + rest periods. The high heat crisps the skin, and the rest periods distribute that high heat gently to the rest of the duck.
We’re using the epic Eleven Madison Park lavender spice rub. Because there’s no need to mess with something that is already amazing.
Ingredients
Whole duck (around 5.5 pounds). The fresher the better, because we’re going to dry it out in the refrigerator
Honey (50g)
Canola oil (30g)
Orange (1)
Eleven Madison Park lavender spice rub: See my separate post on this amazing blend here. You need to grind the first three ingredients with a spice grinder and then combine (without grinding) the lavender flowers).
2 parts Szechuan peppercorns
2 parts dried coriander seeds
1 part cumin seeds
1 part dried lavender flowers
If you don’t have one, you’ll also need a quarter sheet pan with a quarter sheet cooling rack. The cooling rack is essential for proper airflow during the drying and cooking process.
Instructions
This is a five-day process. Be warned!
Day 1
Dry off the skin of your duck with a paper towel and store it on your sheet pan and cooling rack in the refrigerator.
I do this 5 days before cooking because I’m not totally sure how fresh my ducks are; if I knew when my ducks were killed (and I knew my fridge wouldn’t be opened too often throughout the day), I’d extend this a few more days to dry out the skin even further.
Day 4 (or day before cooking)
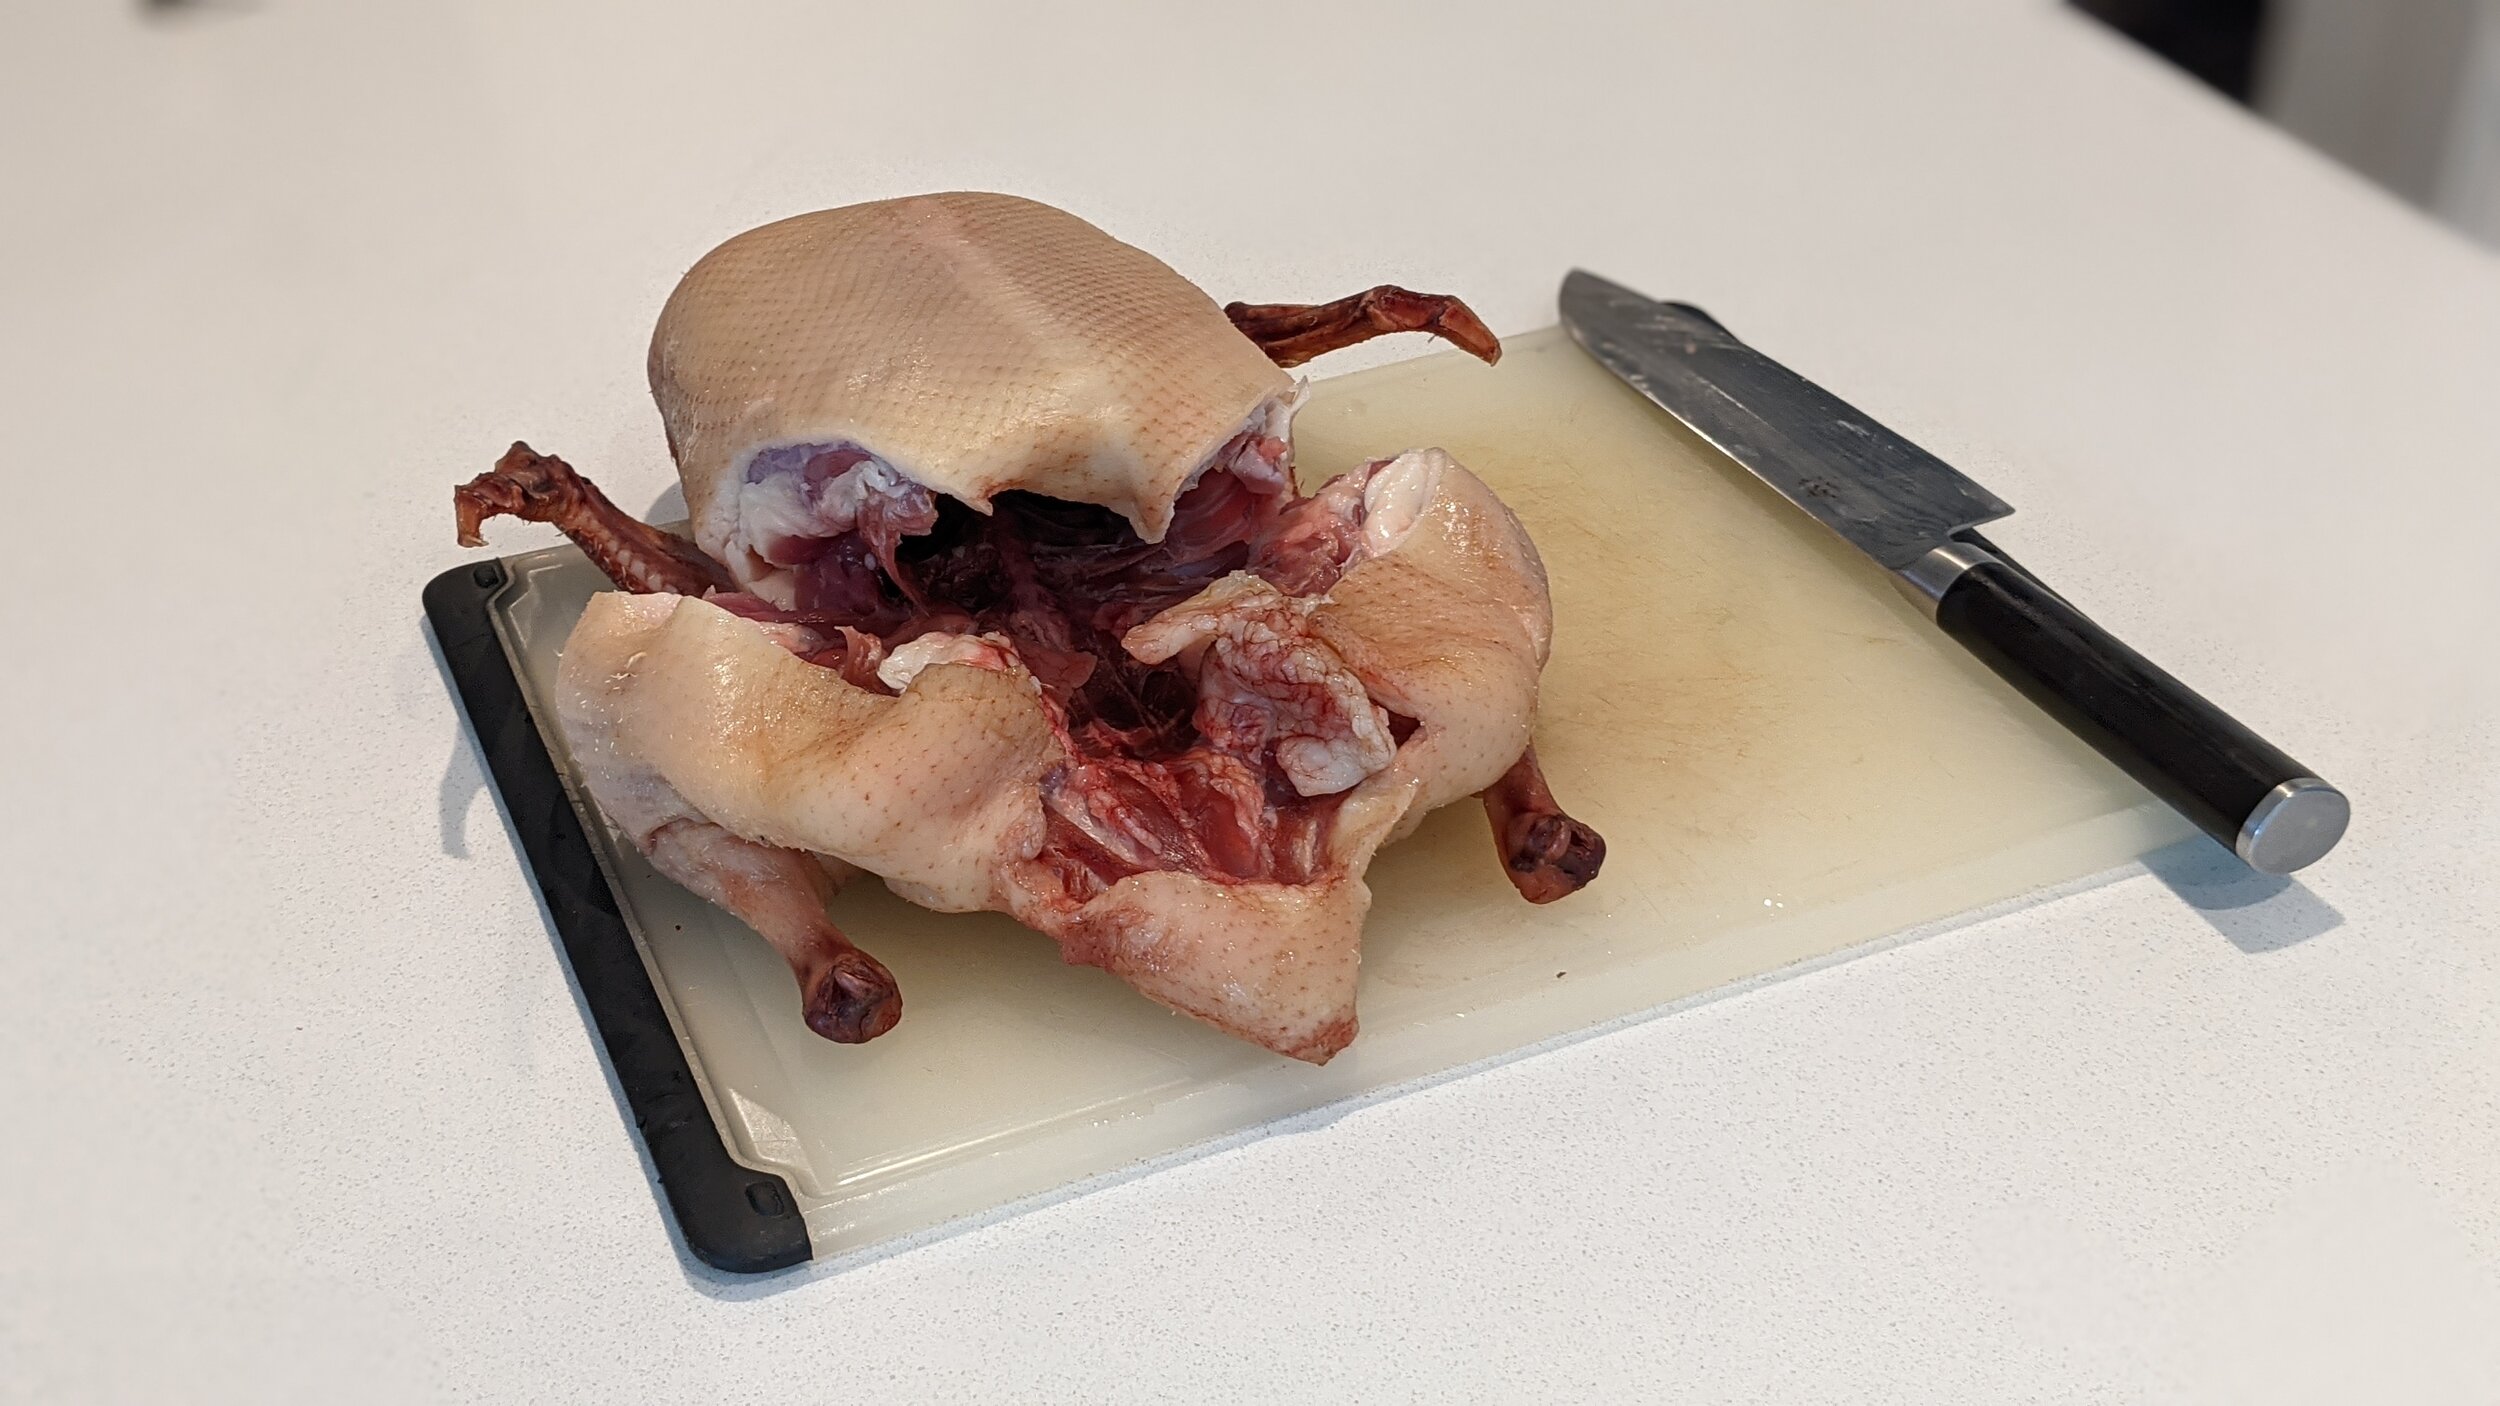
With a sharp knife, remove the legs, spine, and wingtips from the duck so that you are left with just the crown. This is best explained via video, so check out this video on removing a turkey crown here.
We’re only using the crown for this recipe, but the other ingredients should not be wasted! I usually make red wine braised duck on day 4 using the duck legs. Then I put the wingtips, neck, and spine of my duck in the freezer to turn to broth later in the week (after I’ve accumulated more bones).
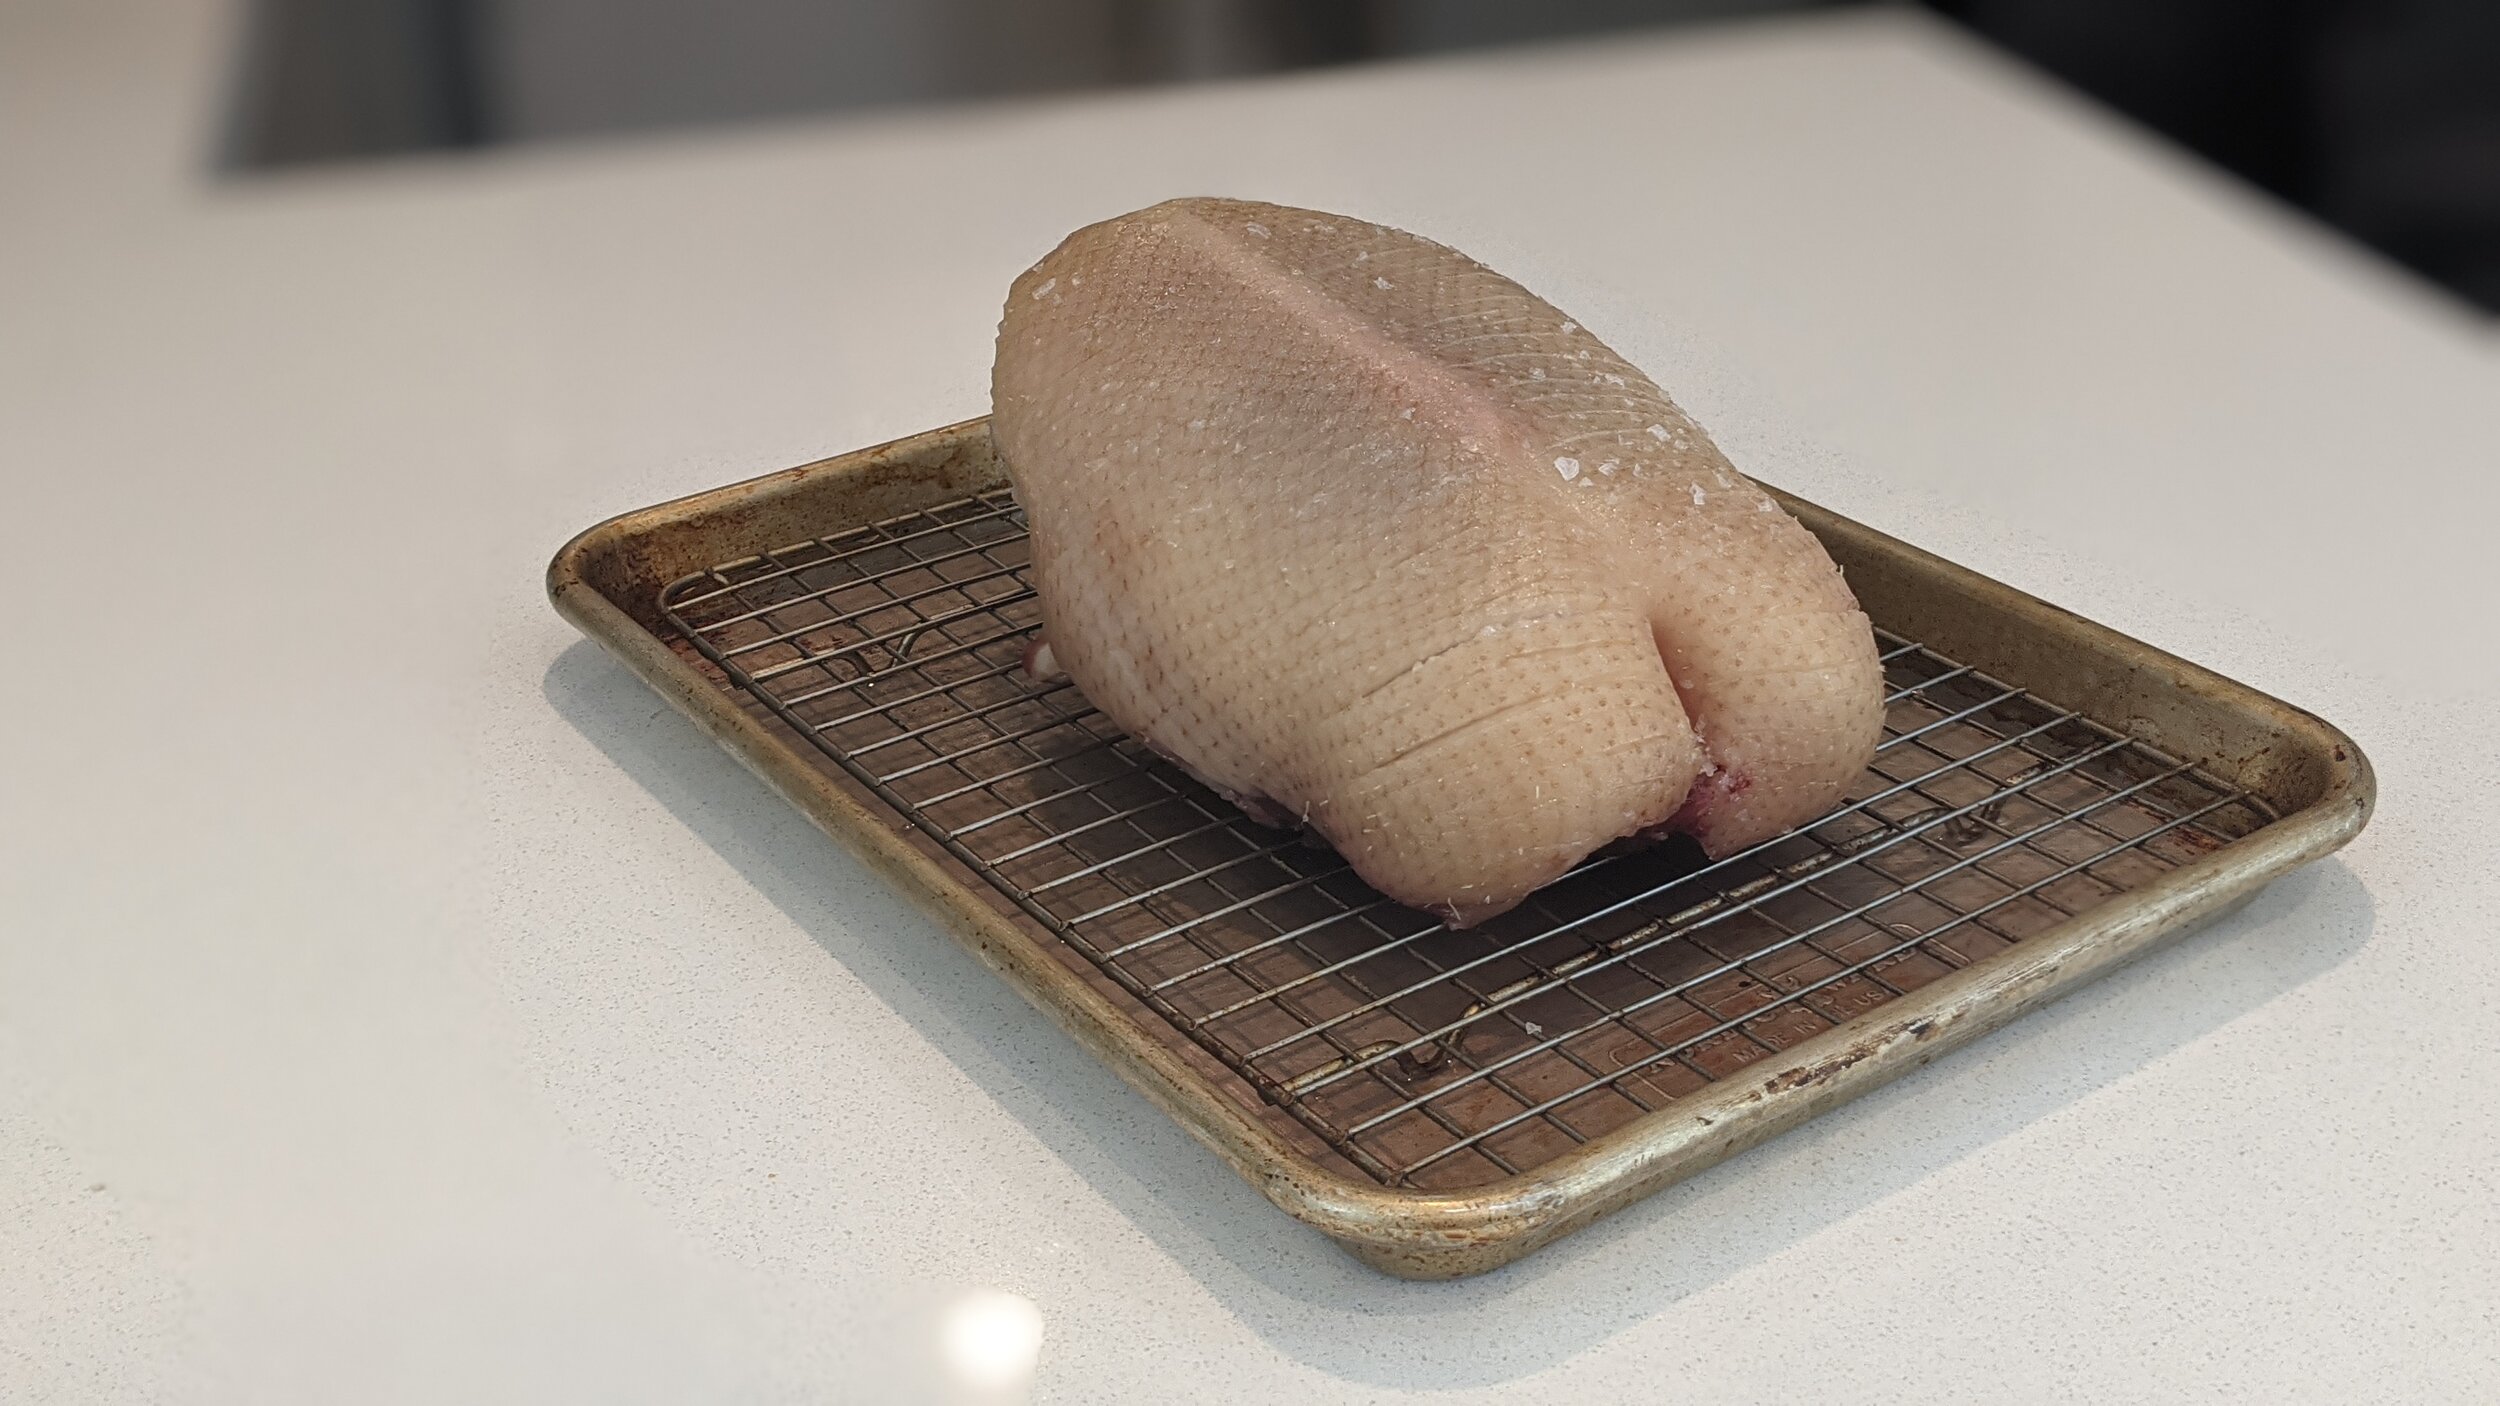
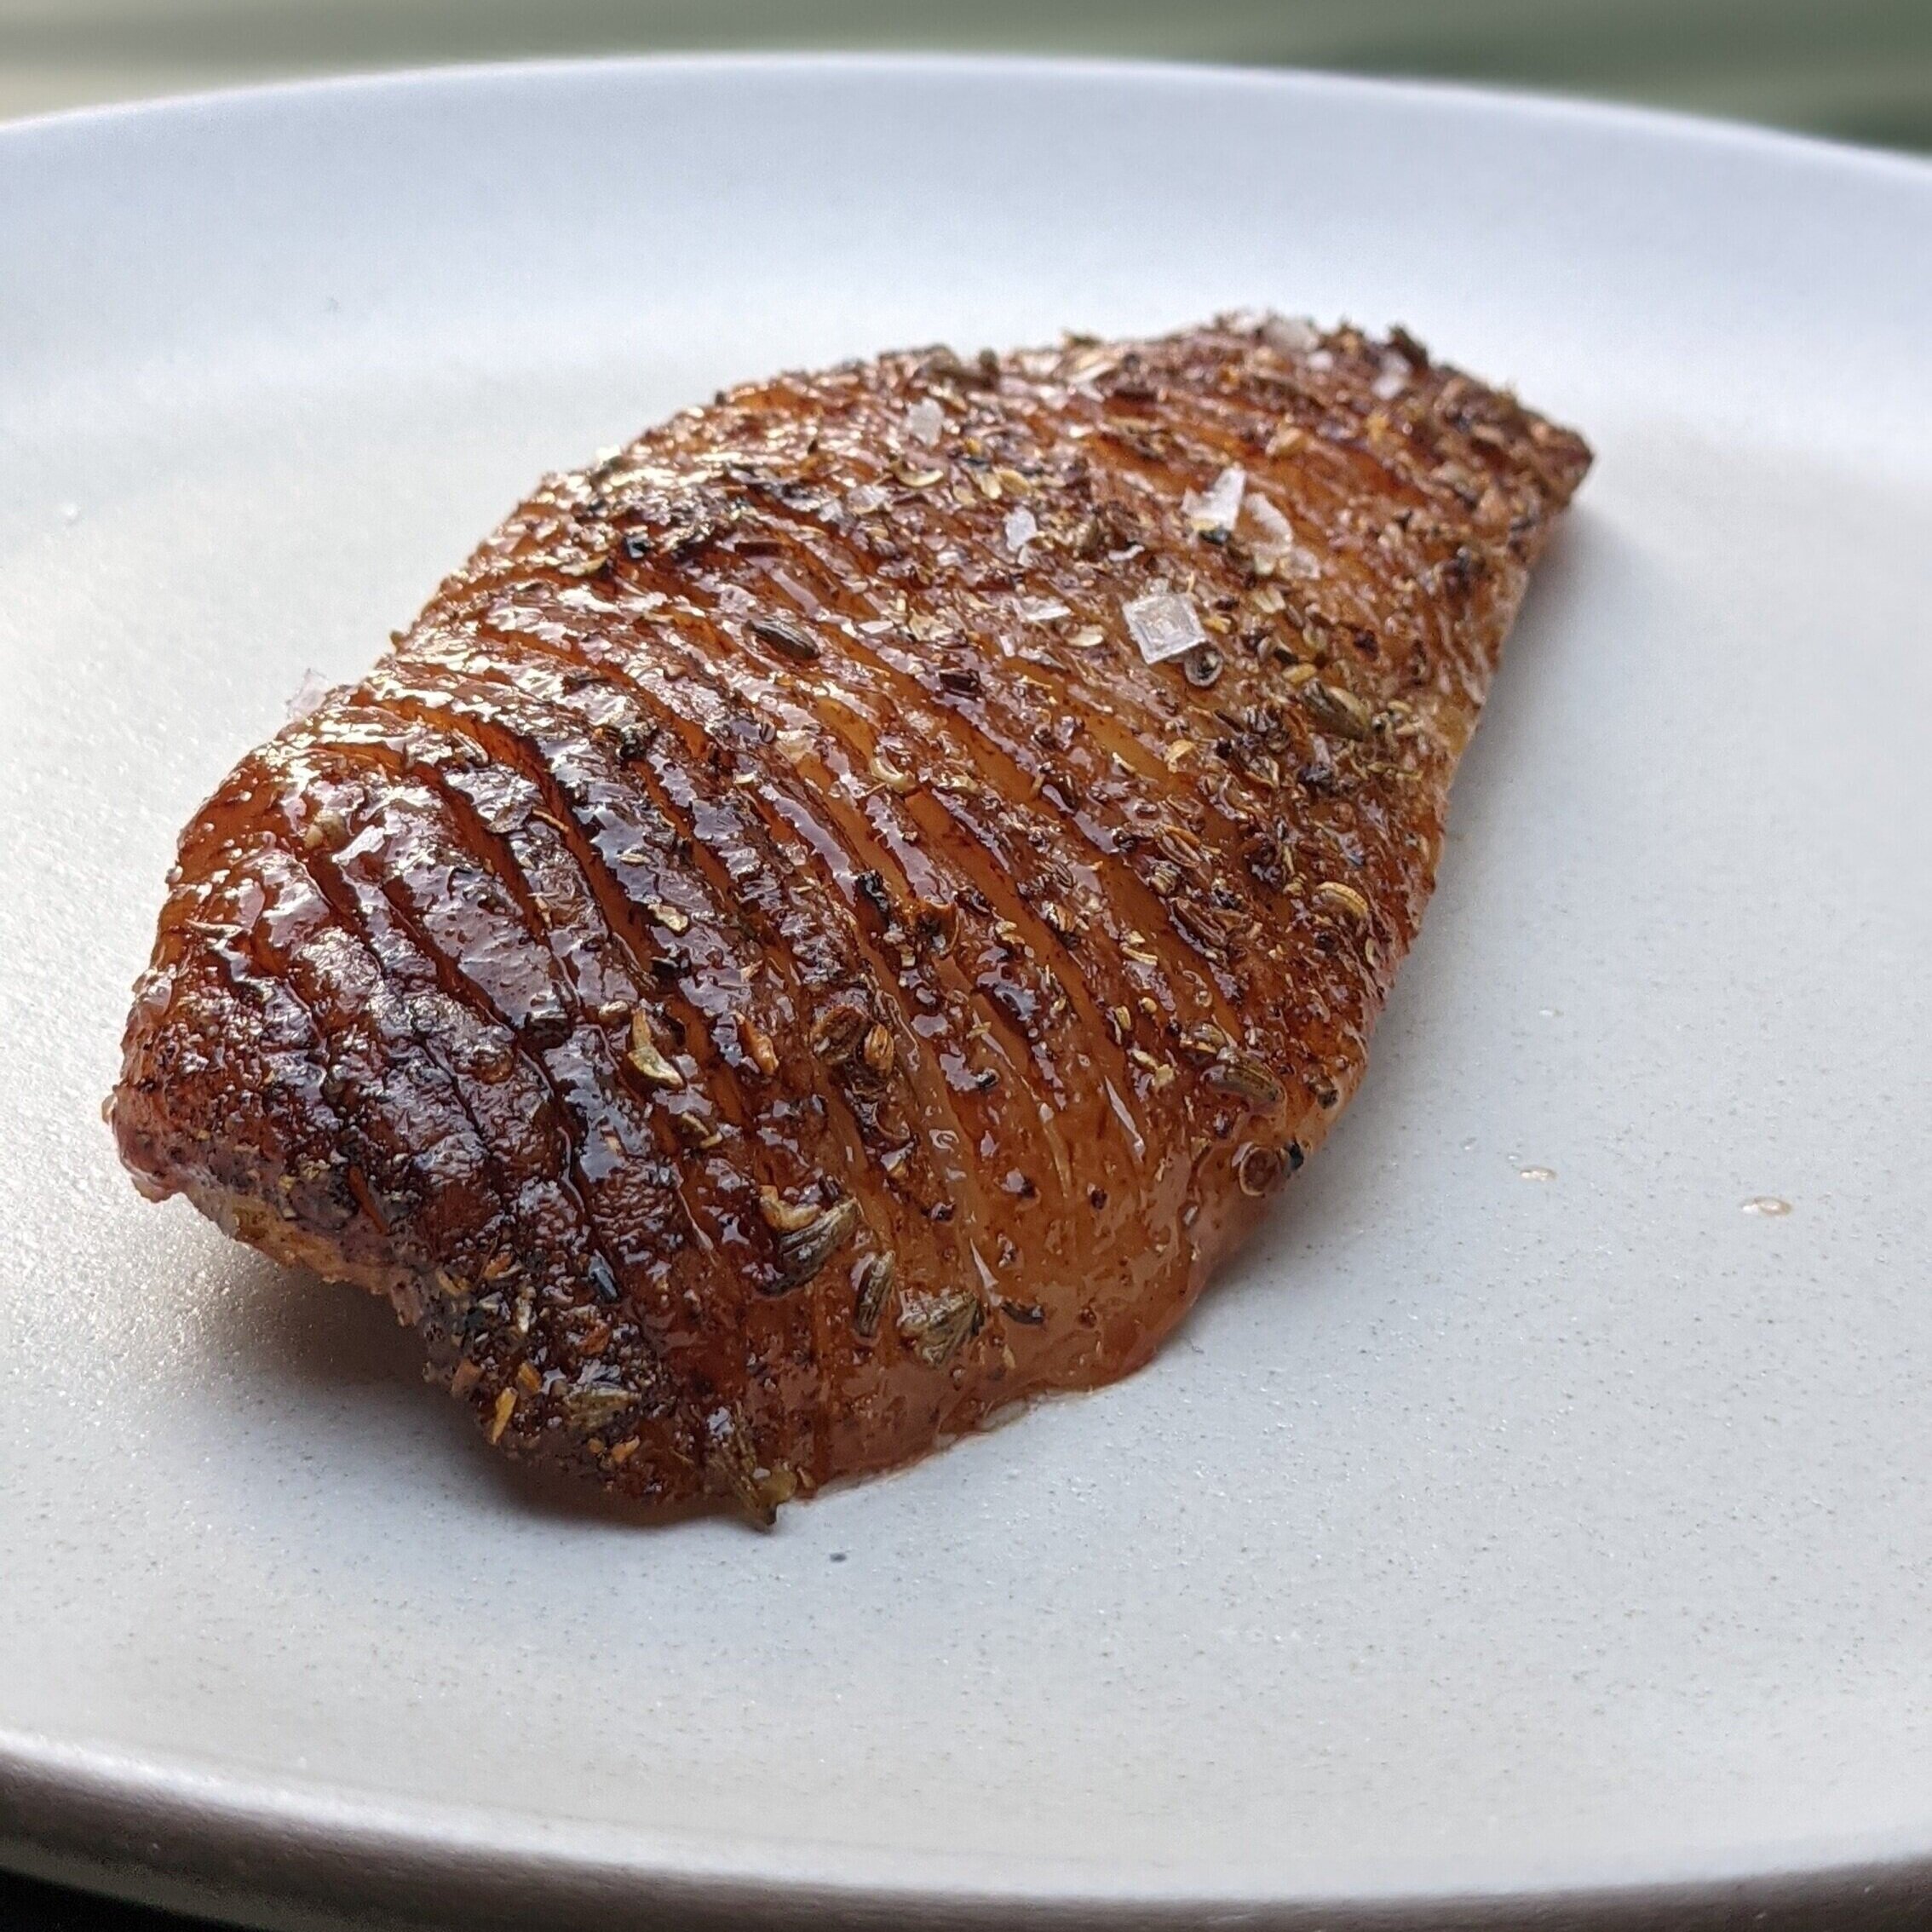
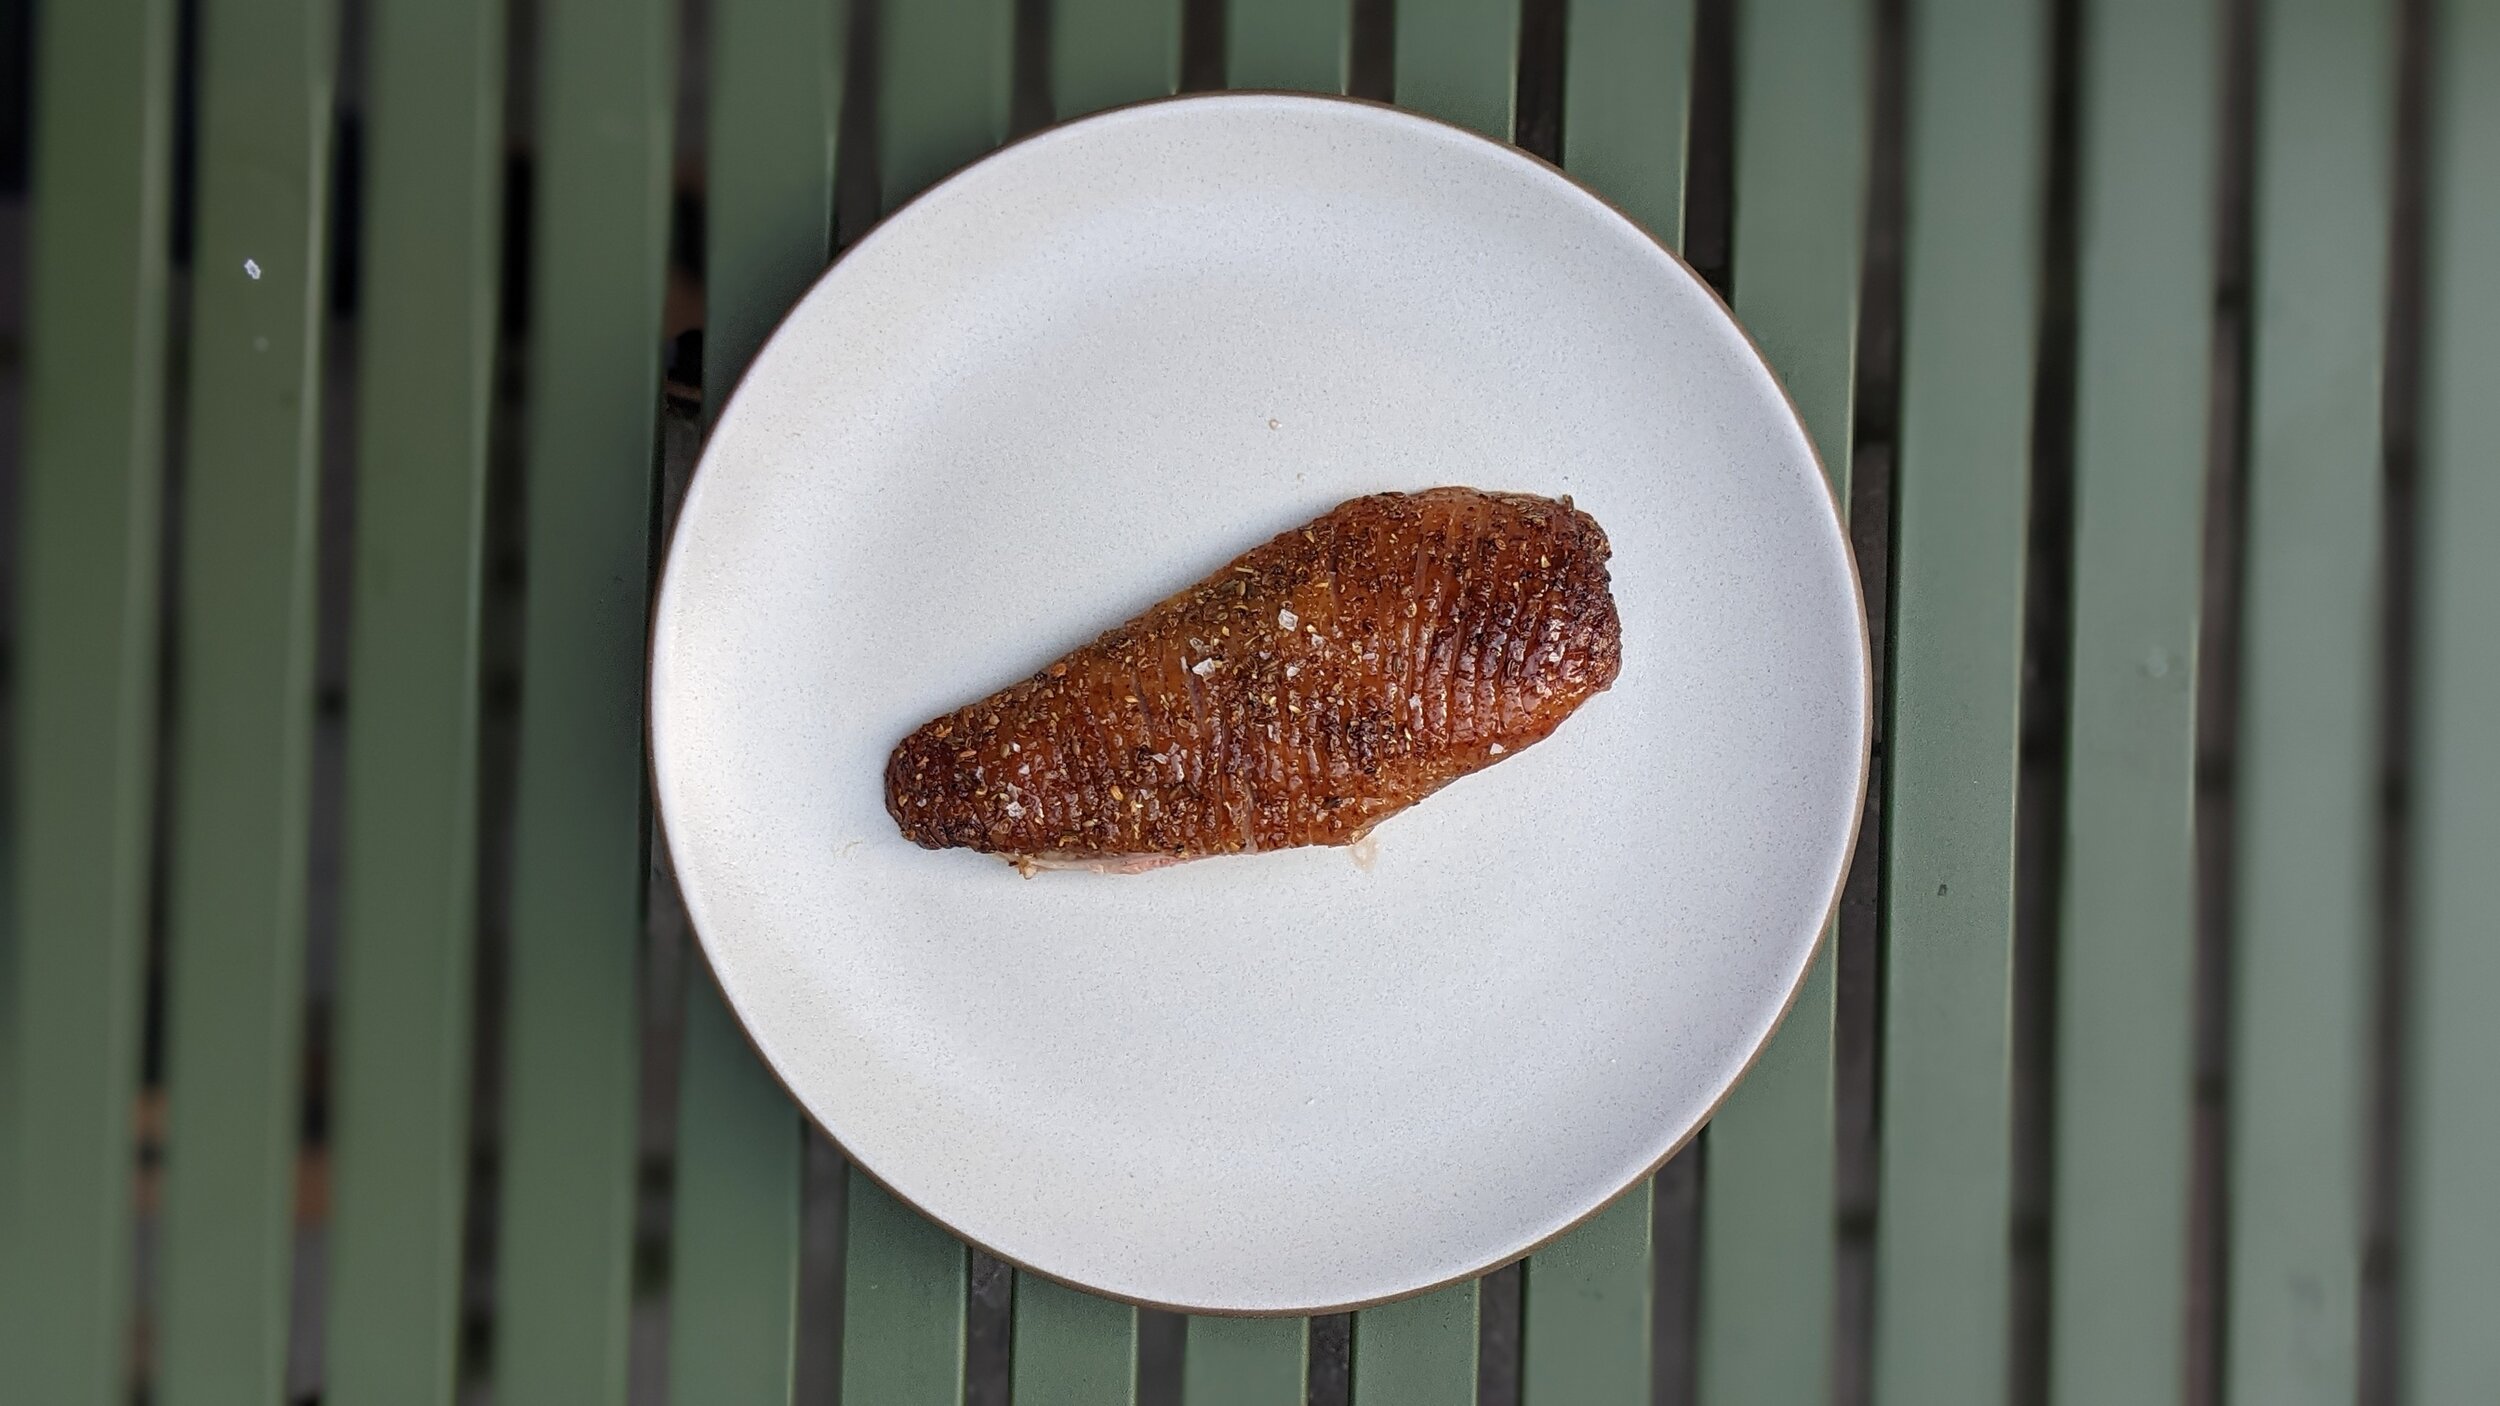
Then, carve small slits across the breast of the duck. These will help the fat render and crisp the skin later on. Dry the duck skin again with a paper towel, then dust it with salt (both on the skin and in the cavity). Return the prepped crown to the refrigerator.
Day 5 (day of cooking)
About two hours before you want to eat, remove the duck from the refrigerator. Bring the duck to room temperature (~68ºF). This should take about an hour. While doing so, preheat the oven at 450ºF (convection!).
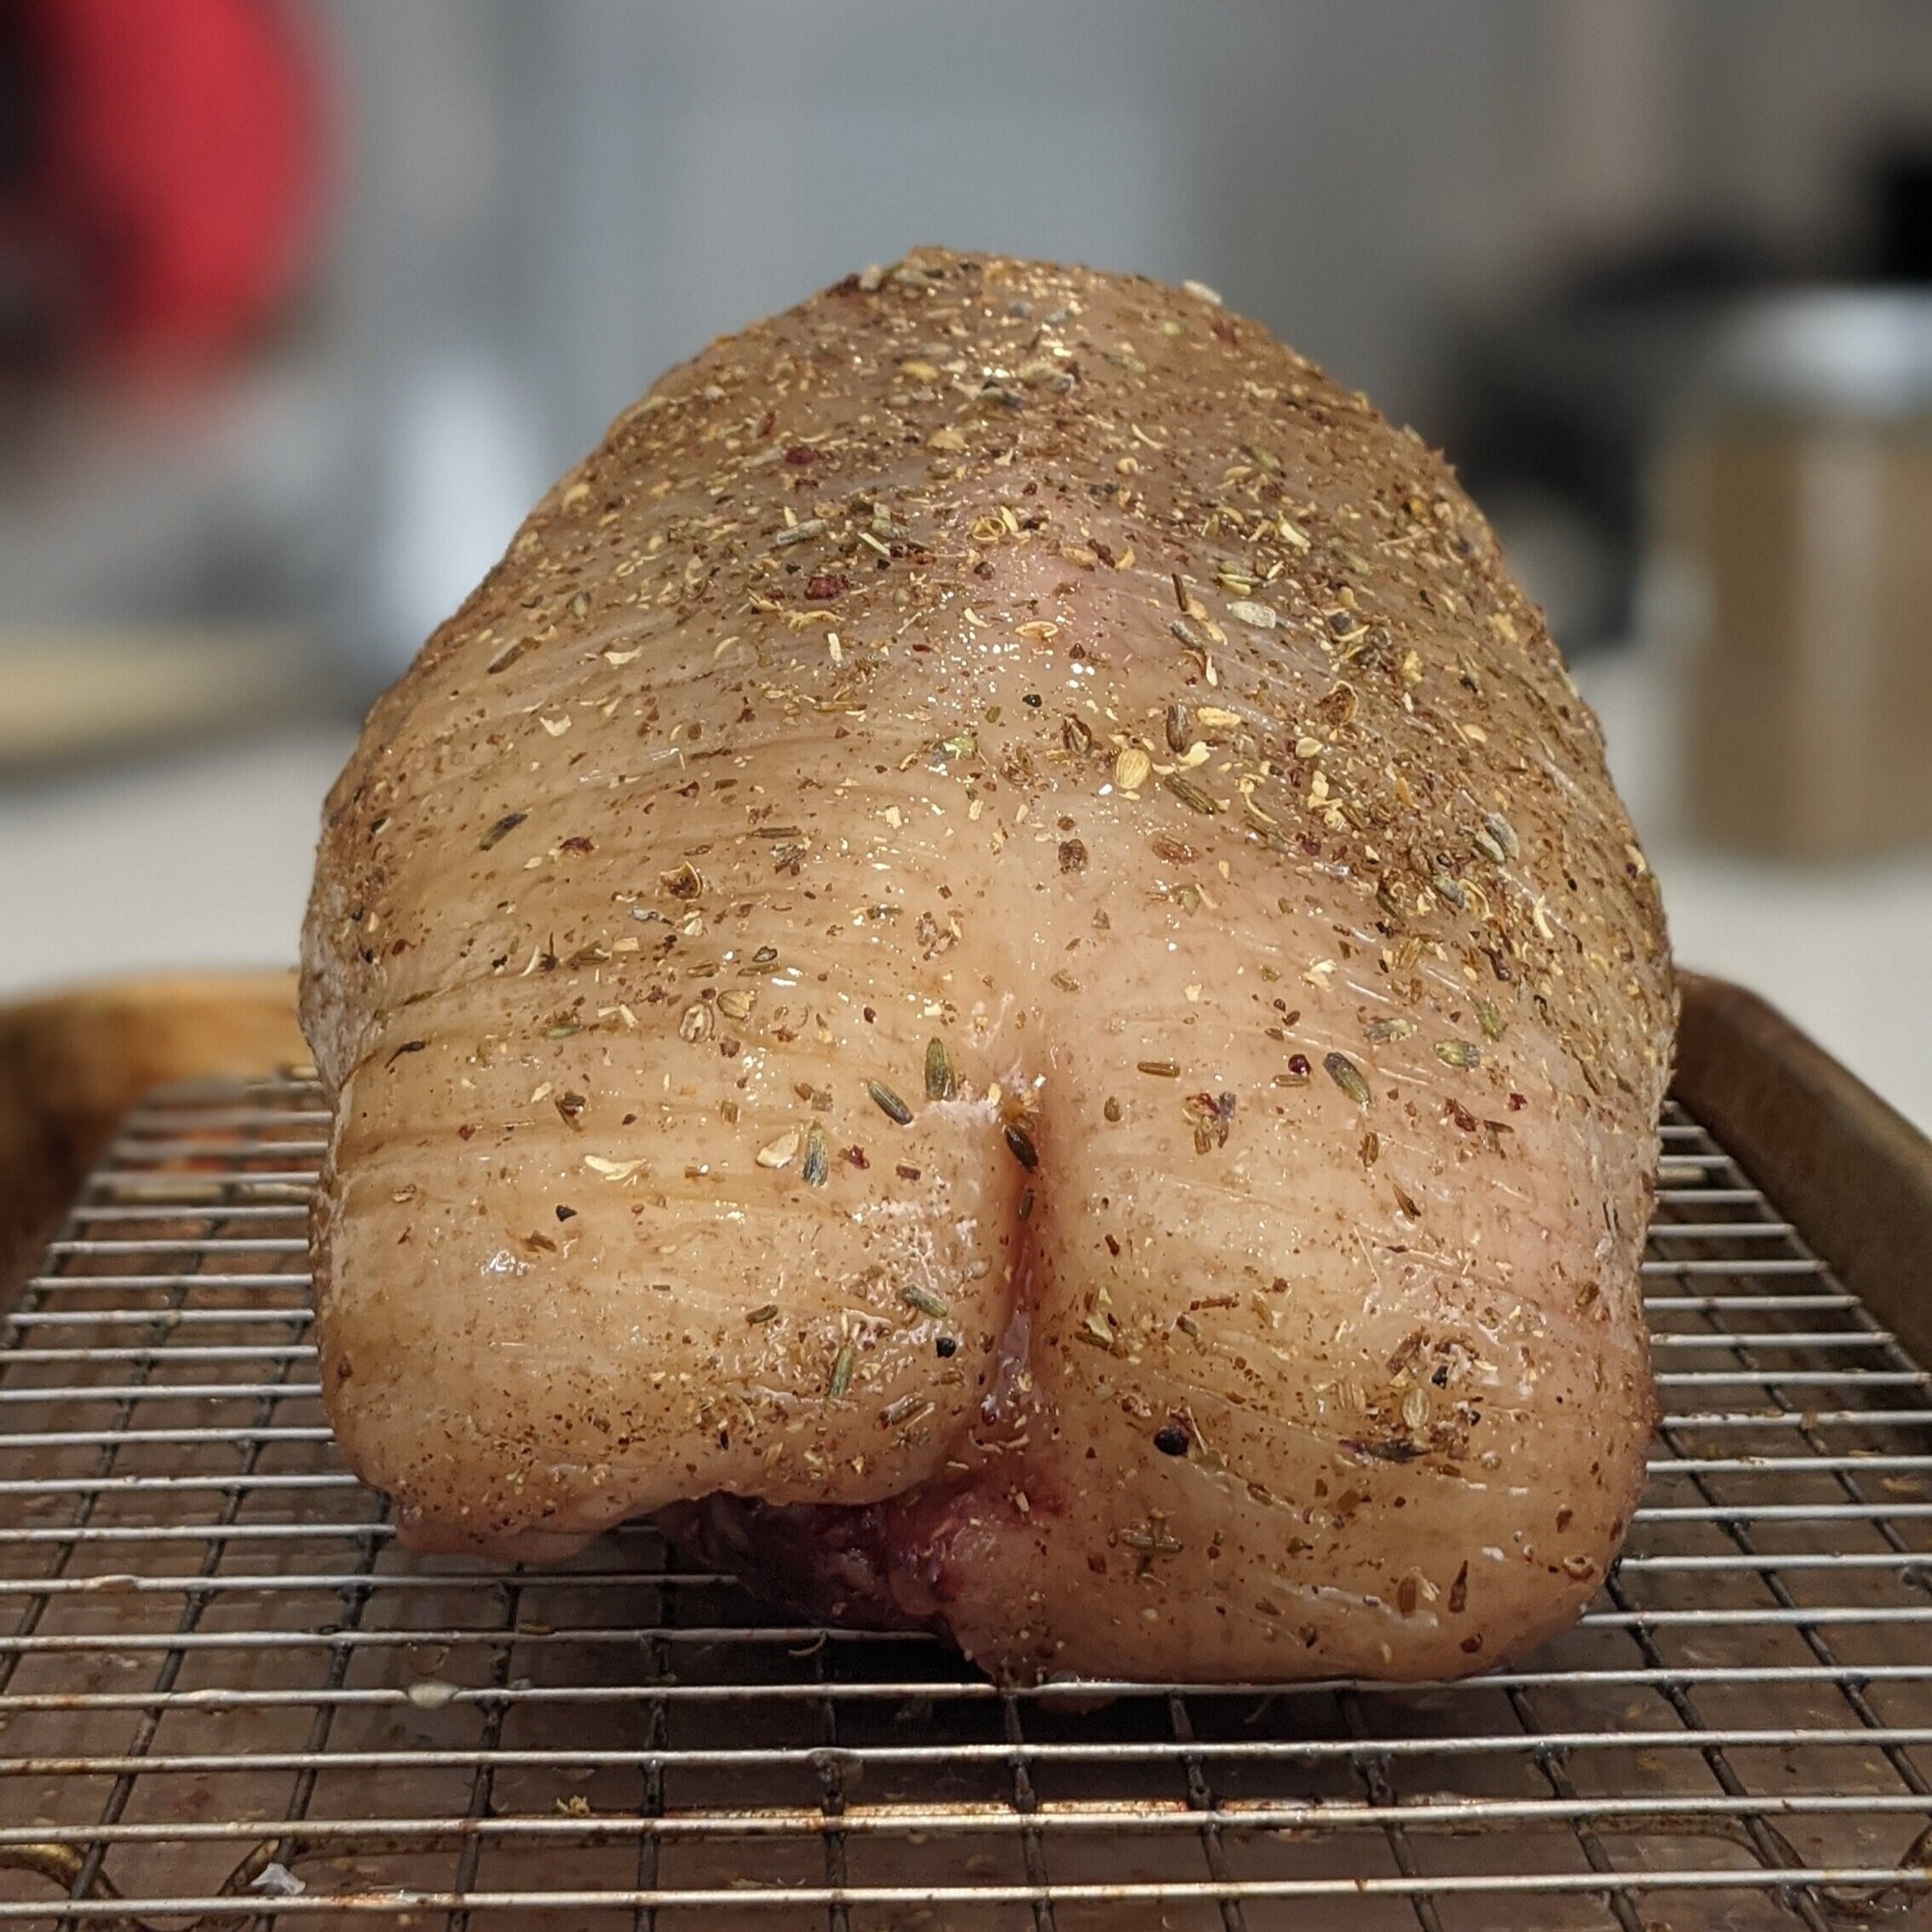
Mix 50g honey with 30g canola oil. We are mixing these because it helps to prevent the honey from burning at such high temperatures. Rub the duck with the honey mixture, then dust it with the lavender spice mix (holding your dusting hand a foot away from the duck to distribute the spice more evenly).
Stuff the crown with a sliced orange to help it keep its shape, then add water to the bottom of your pan (otherwise you’ll get a lot of smoke from drippings).
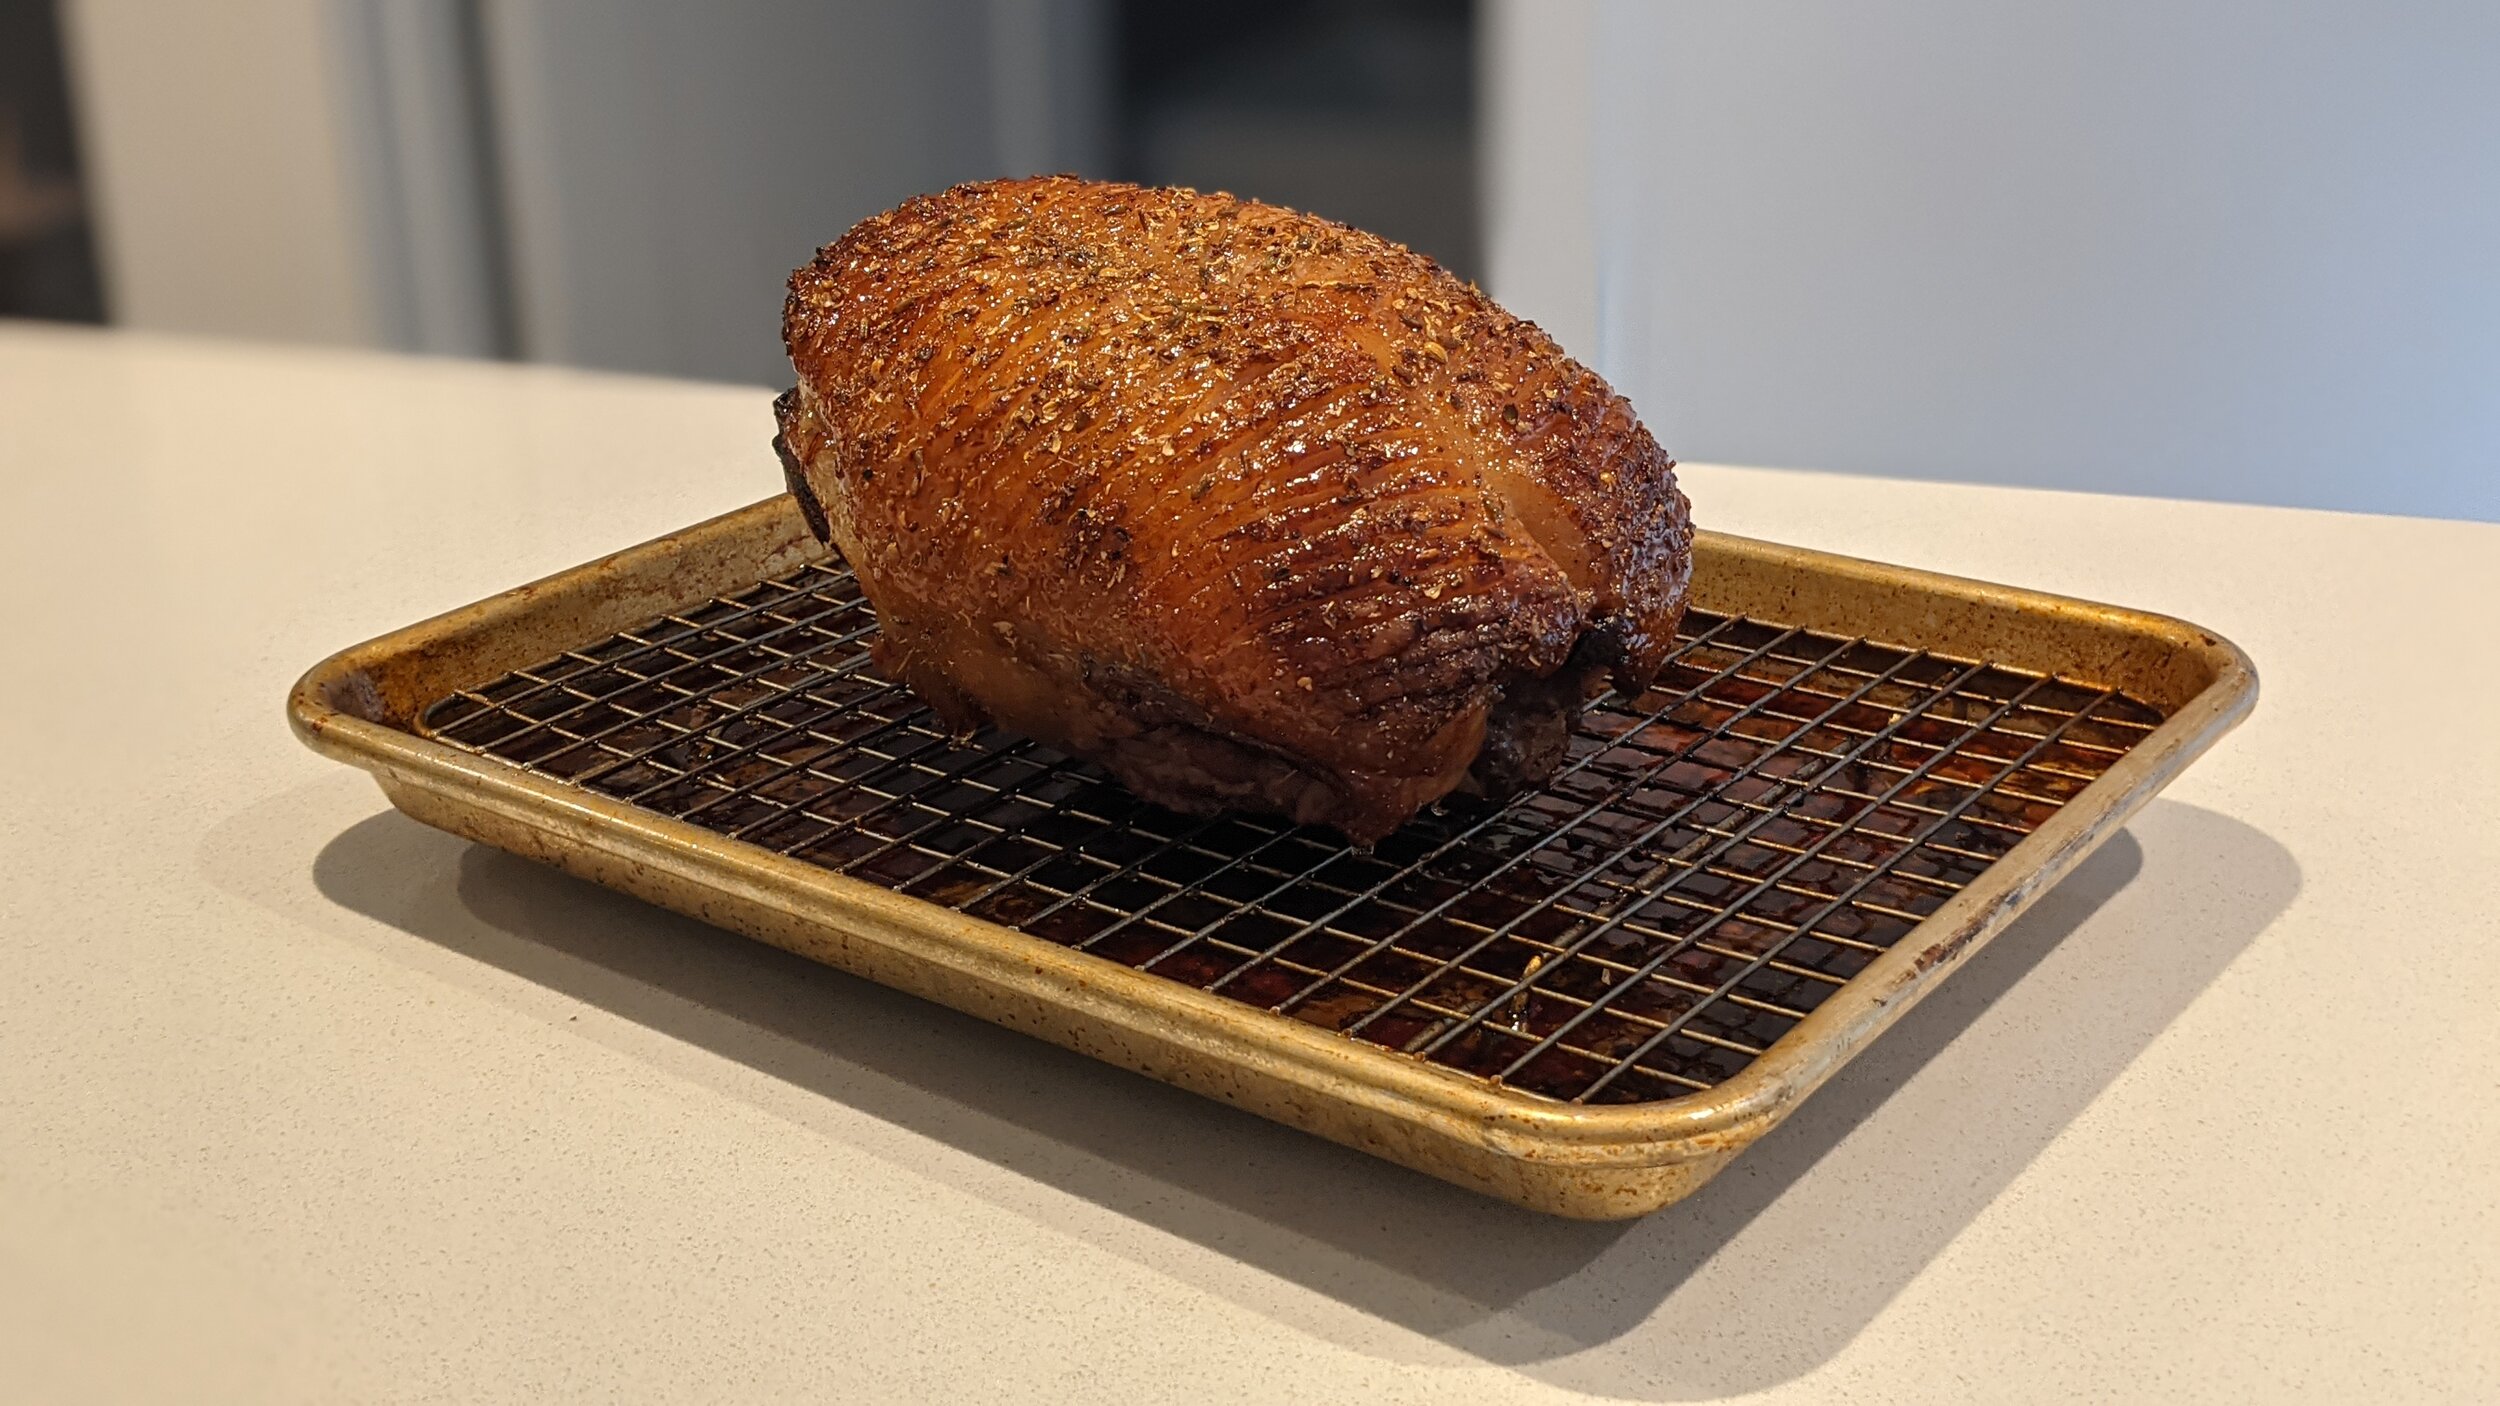
Cook the duck like so:
13 minutes in oven
10 minutes out of oven
10 minutes in oven (rotating the duck a bit from before)
10 minutes out of oven
5 minutes in oven (rotating the duck a bit from before)
10 minutes out of oven
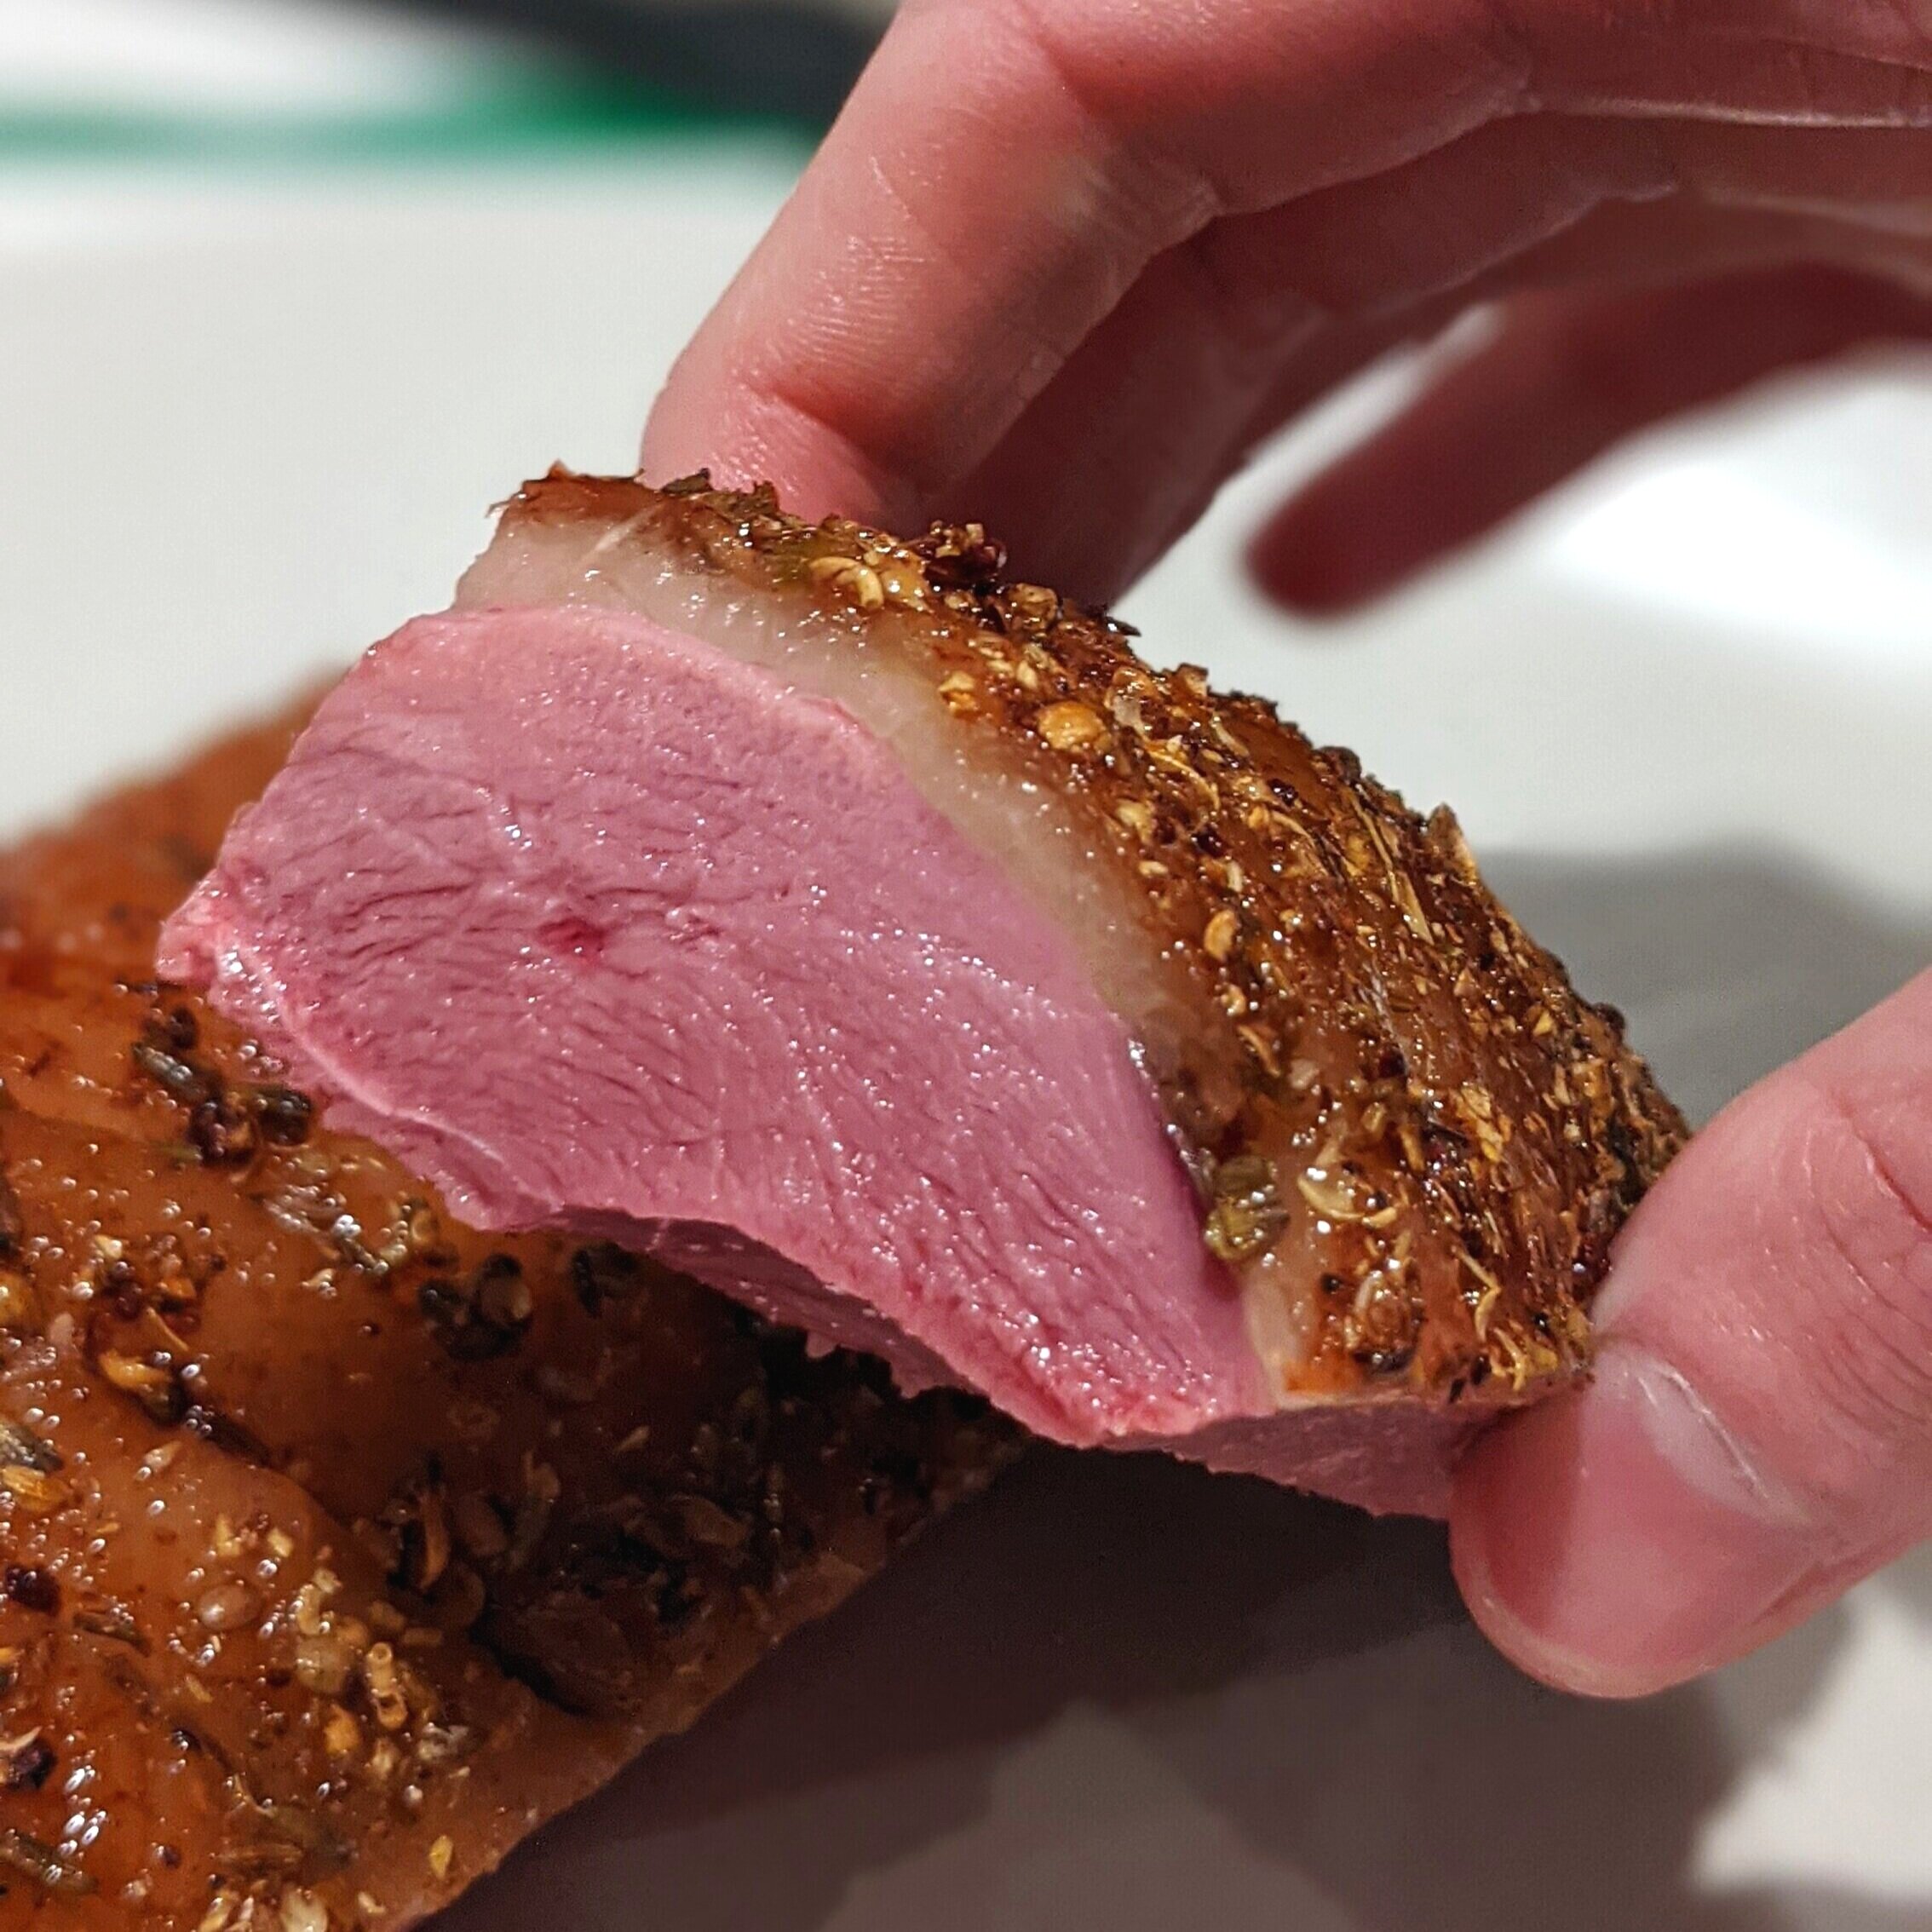
This on/off process is what crisps the skin while gently cooking the meat with residual heat. Even the final rest at the end is important for cooking the meat, so don’t carve right after taking it out of the oven! The breast meat by the bone should be a nice 130ºF by the time you finish the final rest.
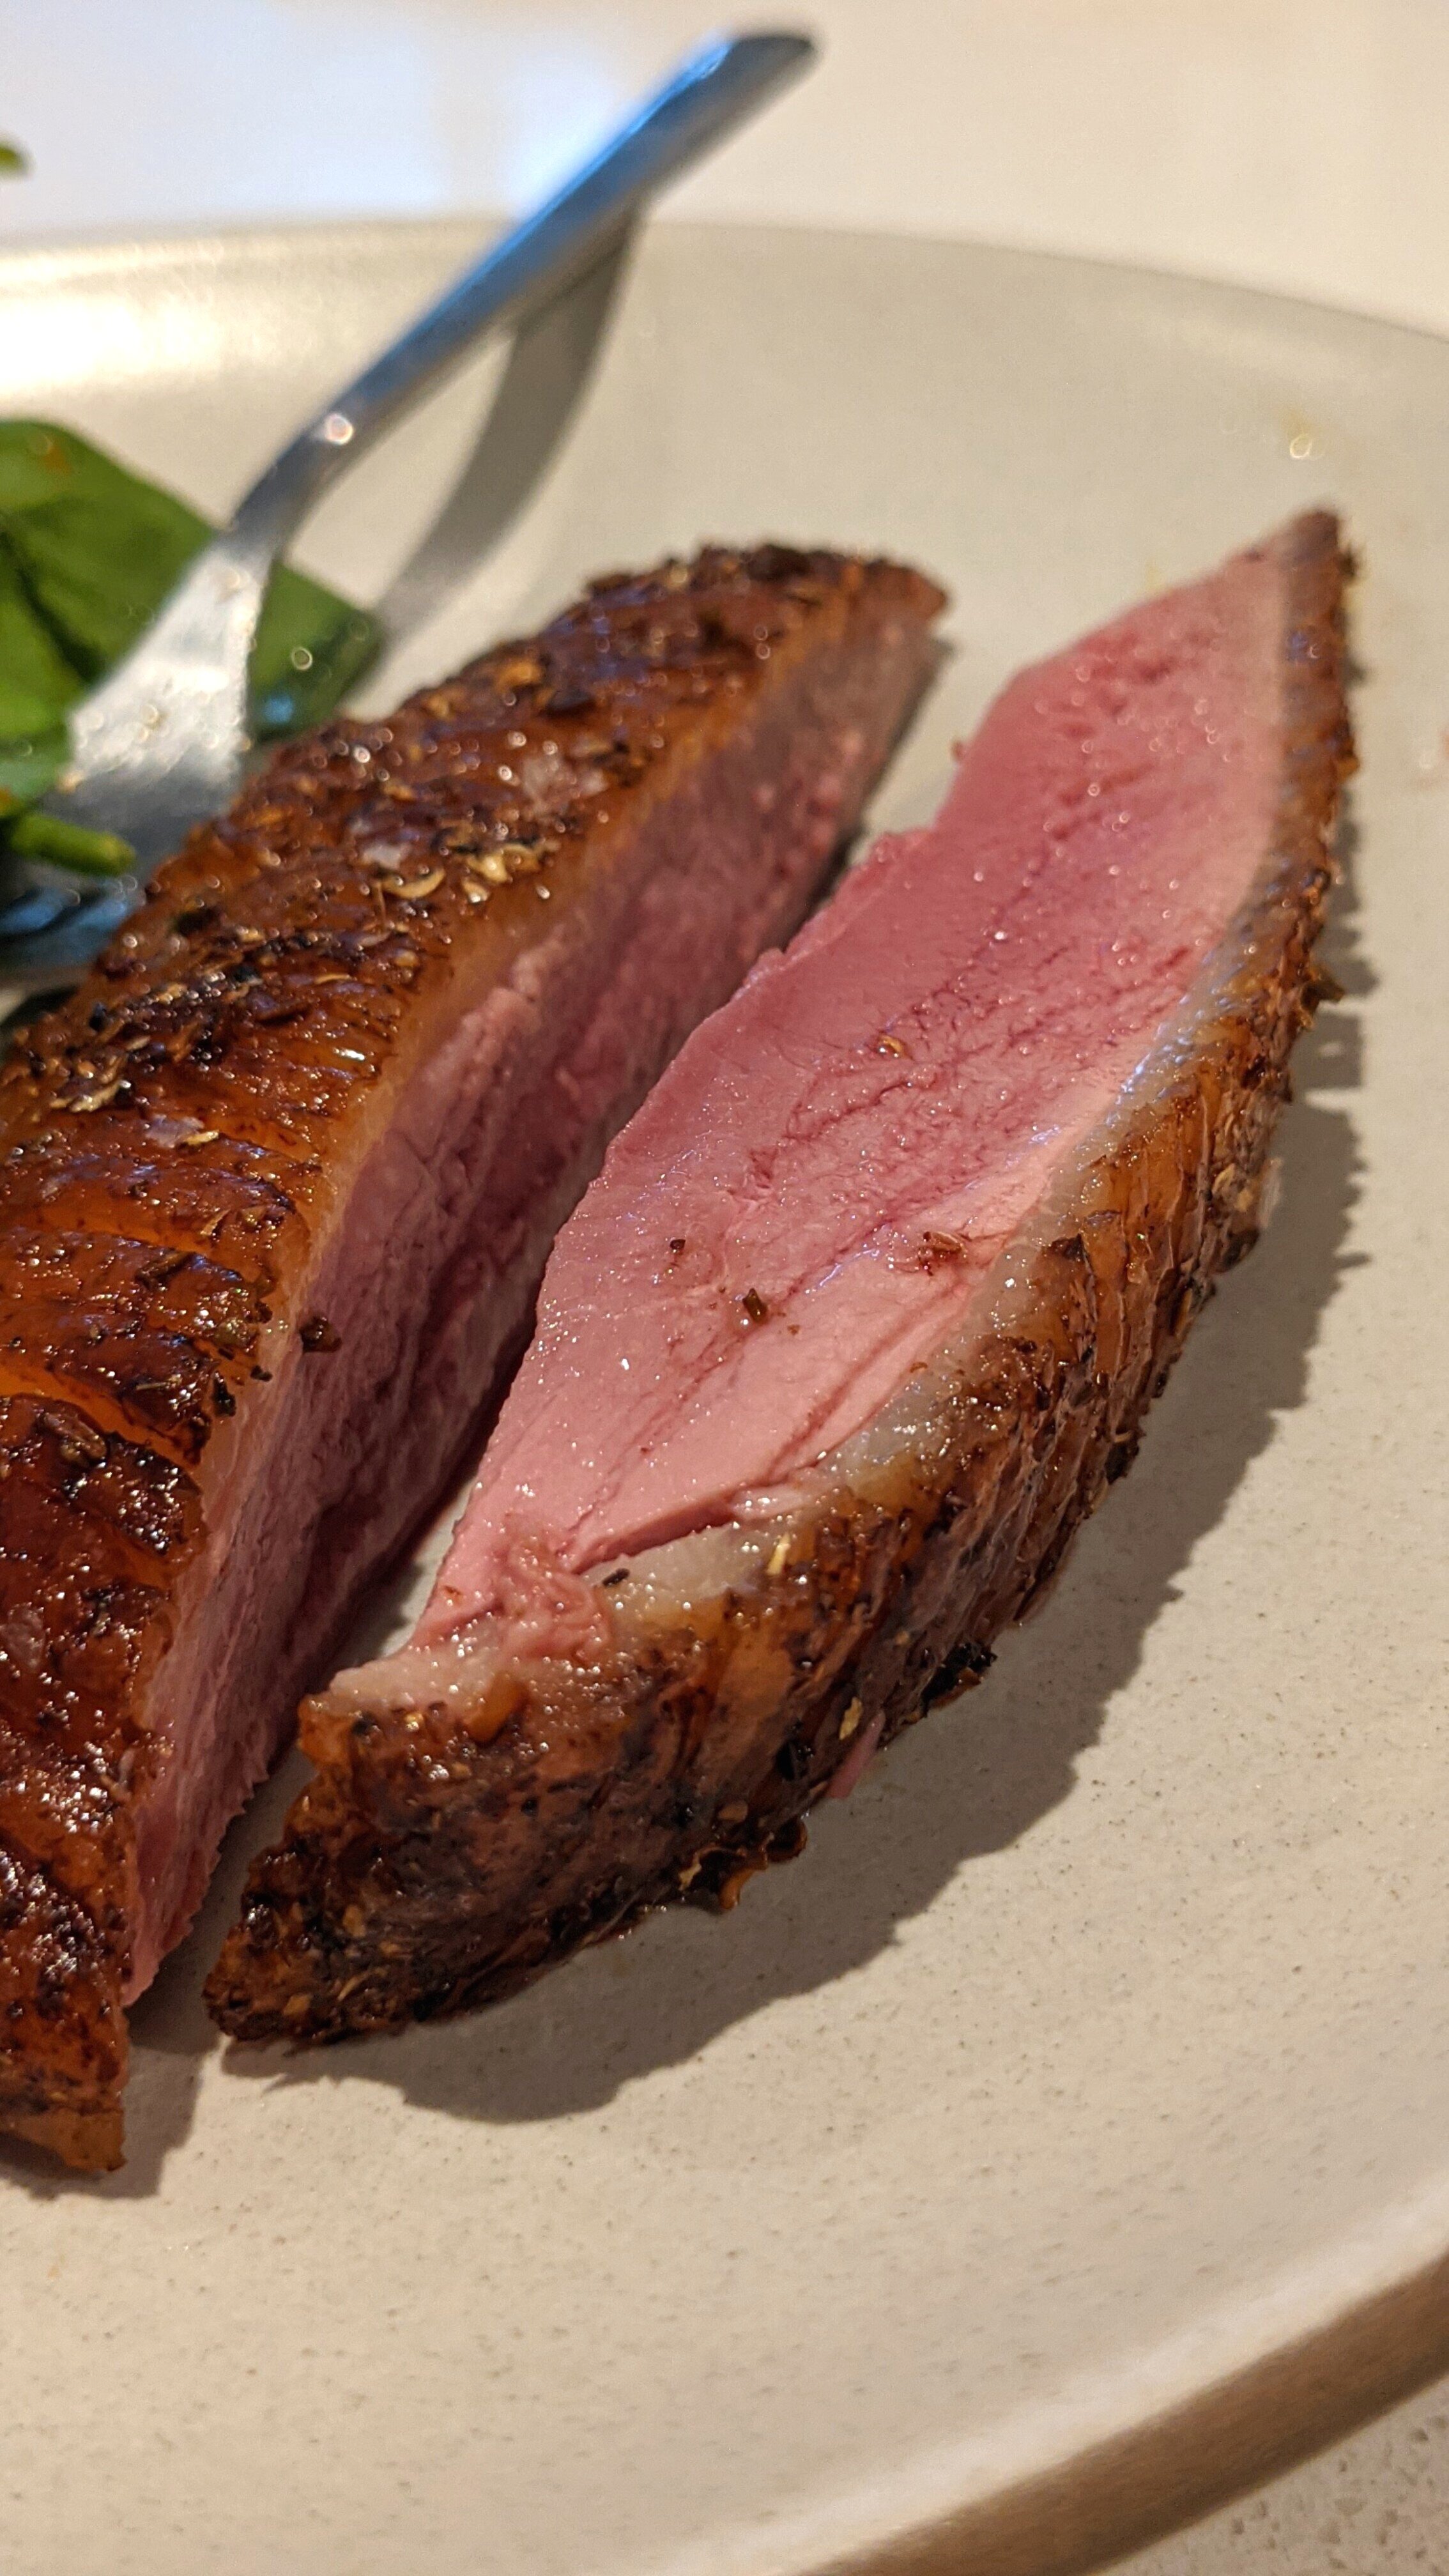
When you carve it, I recommend carving further from the bone than you would carve chicken, as I find the areas with silver skin (the strands of connective tissues and membranes on the breast) to be a bit tough. Be sure to clean up the shape of the breast (giving it a natural geometric shape) and salt both sides before serving.
You might need to adjust this recipe for your oven/duck size. If you finish the recipe and the duck is too rare, I recommend finishing it meat-side down with a bit of butter in a low-heat pan (rather than putting it back in the oven). Otherwise, you risk overcooking the meat closest to the skin. Then, next time you do this recipe, add more time to the first oven round (the 13 minute one) as this is the round where you have the least worry of overcooking the meat closest to the skin (since it starts this round at room temp).